How To Set Up A Newsletter Campaign In Mautic
Estimated Reading Time: 8 MinutesNote: This guide is the starting point of a series of tutorials and how-to's for Mautic trial users to get to know Mautic and get the most return out of it like increasing your leads, customer lifetime value, more loyal returning customers, and lowering your customer acquisition costs.
Start your Mautic Trial if you haven't already.
Setting up an effective newsletter flow is essential for engaging your audience, nurturing leads, and maintaining strong customer relationships. Mautic provides powerful tools to create, manage, and analyze your newsletter campaigns with precision and efficiency.
With Mautic, you can design compelling newsletter campaigns that capture new subscribers, deliver personalized communications, and help you achieve your marketing goals.
Steps For Setting Up A Newsletter Campaign In Mautic
Follow the steps given below to set up and execute a newsletter campaign using Mautic.
Step 1: Create A Subscription Form
To capture the visitor's interest in the newsletter, you need to create a signup form. Navigate to the “Components” menu in the main navigation and select “Forms.” After this, Click on "New" to create a new form. You will now have to choose between a “Campaign form” and a “Standalone form.”

Read ‘How To Capture Email Addresses Using A Form And Assets’ to learn more about campaign forms and standalone forms.
In this instance, select "Campaign forms." Design your form to capture all necessary details, such as name and email.
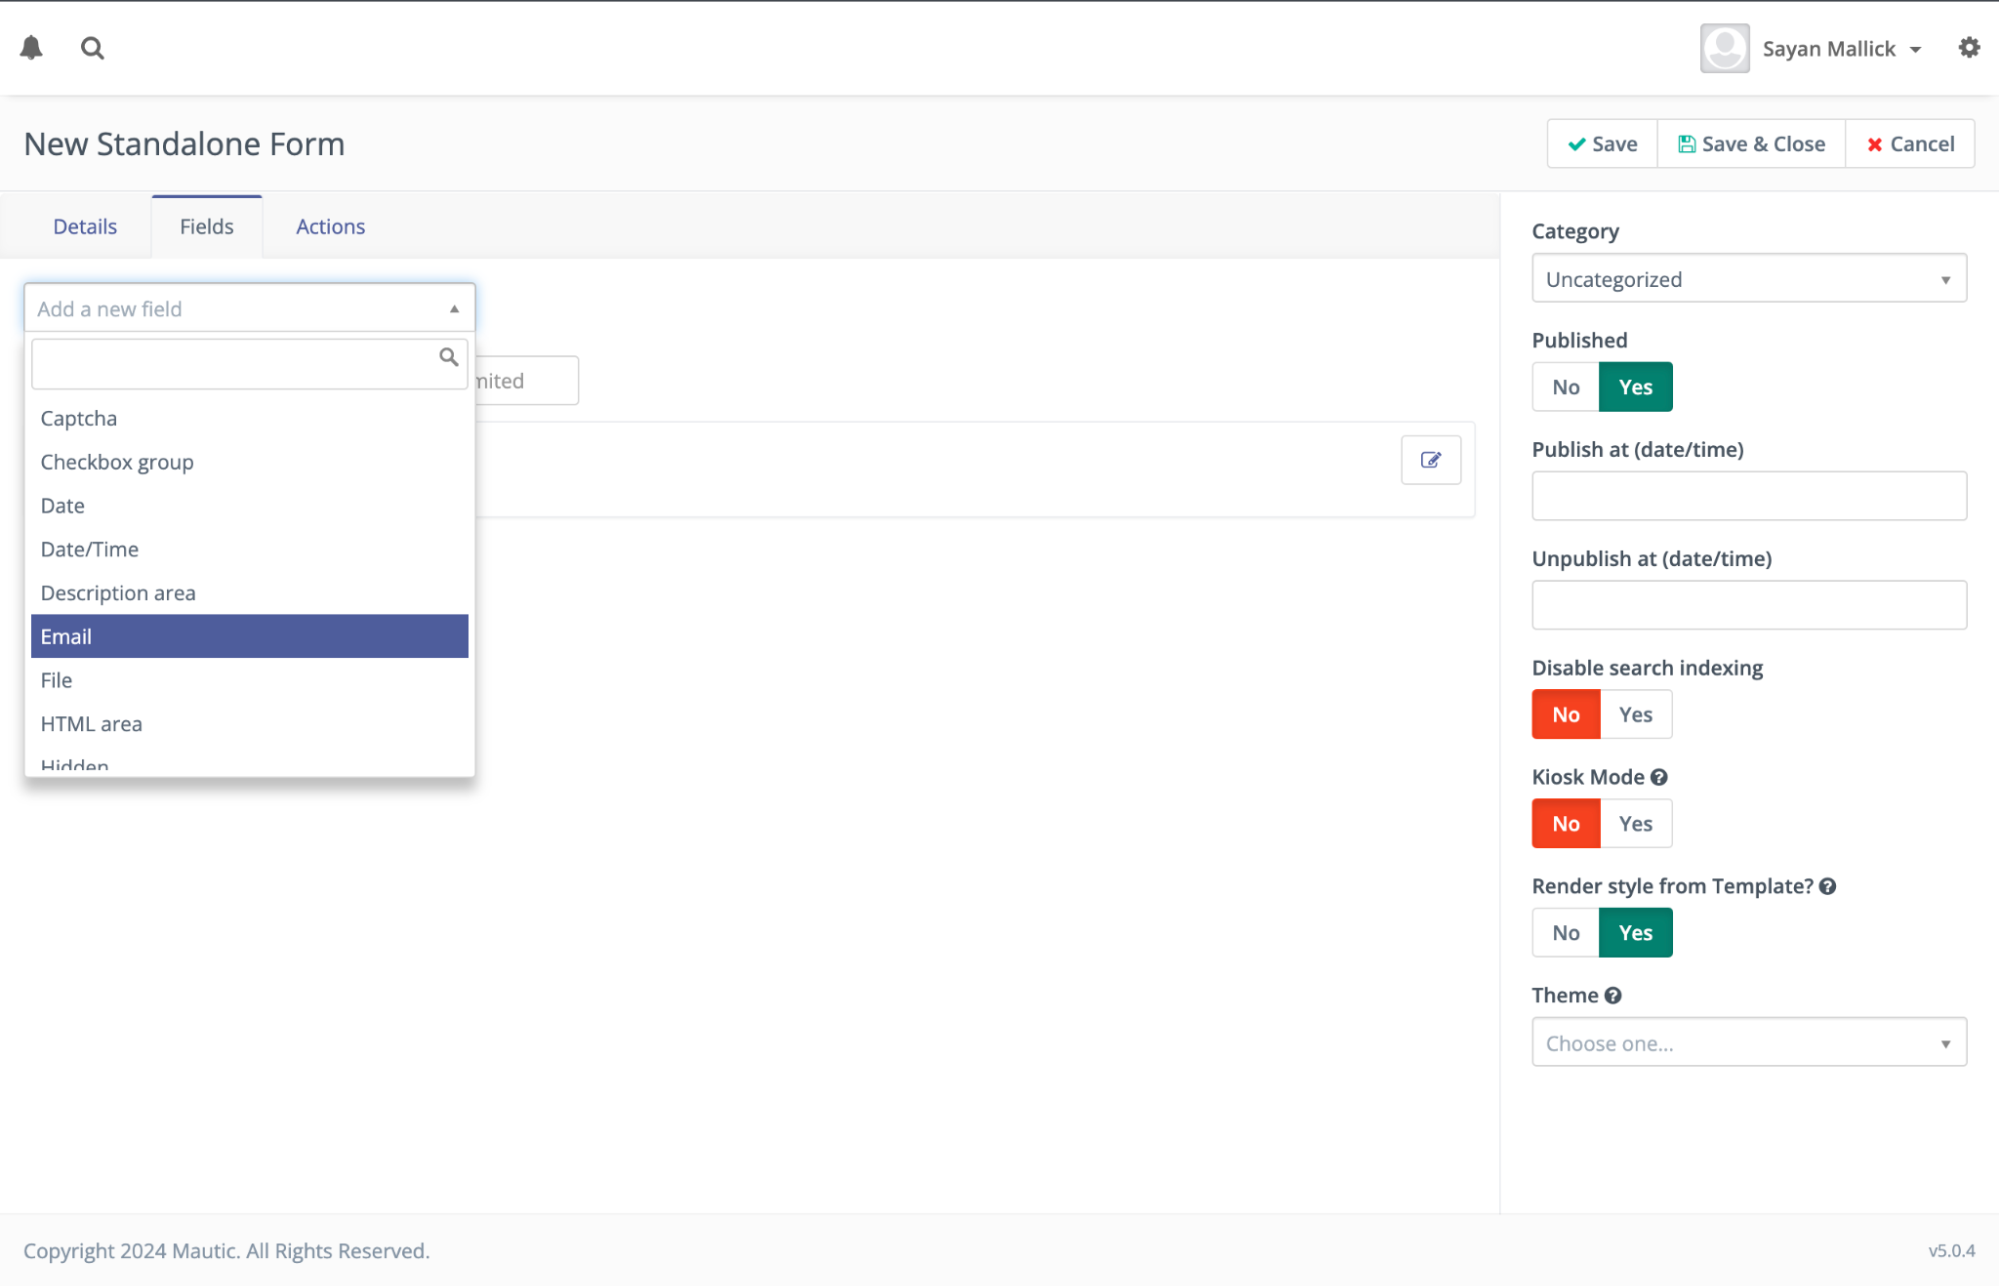
Ensure the email field is marked as "Required" to prevent visitors from skipping it. The collected email addresses will be essential for sending newsletters and future communications.
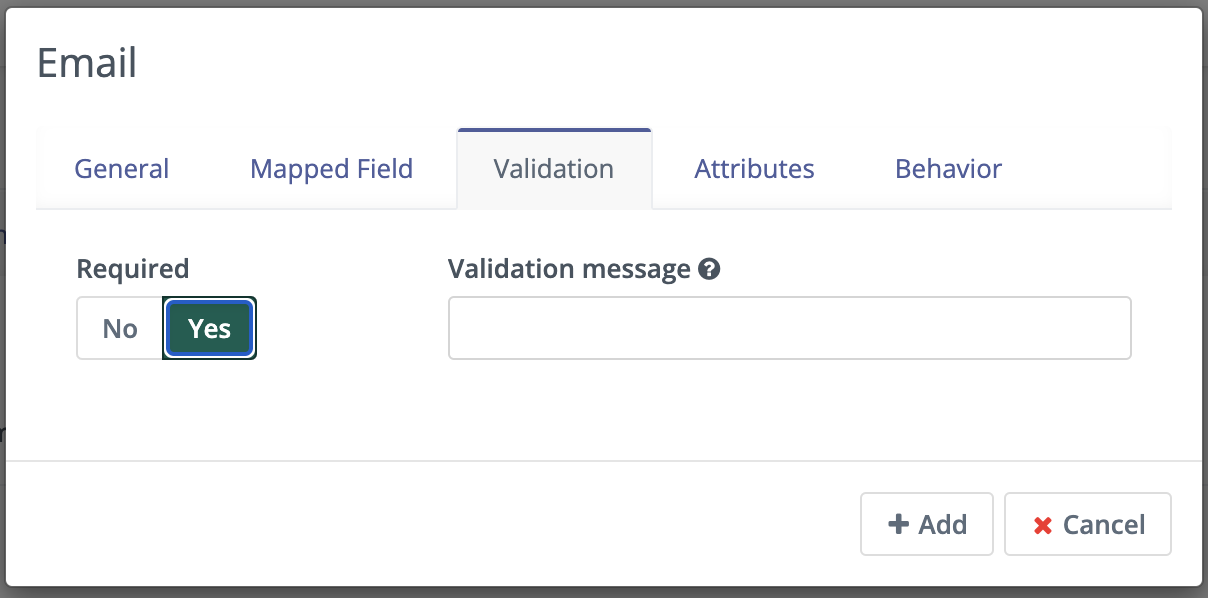
After you have added all the required fields, save and close the window.
Step 2: Embed The Form On Your Website
Embed the newsletter form on your website to start capturing sign-ups. If you’re using a Mautic landing page, simply add the form via the “Editor” option in the settings. For added flexibility, consider using the “Form HTML” option.
Here, you will have to choose between:
- Automatic: Mautic will automatically generate the form wherever you use it, providing the most updated copy of the form. If you use the “Via iFrame” option in “Automatic,” you need to adjust the height and width attributes to fit the form.
- Manual Copy: If you make any changes to the form, you need to manually update the HTML code. This allows you to edit the code and not rely on Mautic to update the form.
Based on your choice and website type, place the embed code in the appropriate location.
- WordPress Websites: Use a custom HTML block or a plugin that allows custom scripts.
- HTML Websites: Paste the embed code directly into the HTML where you want the form to appear.
Step 3: Create Audience Segments
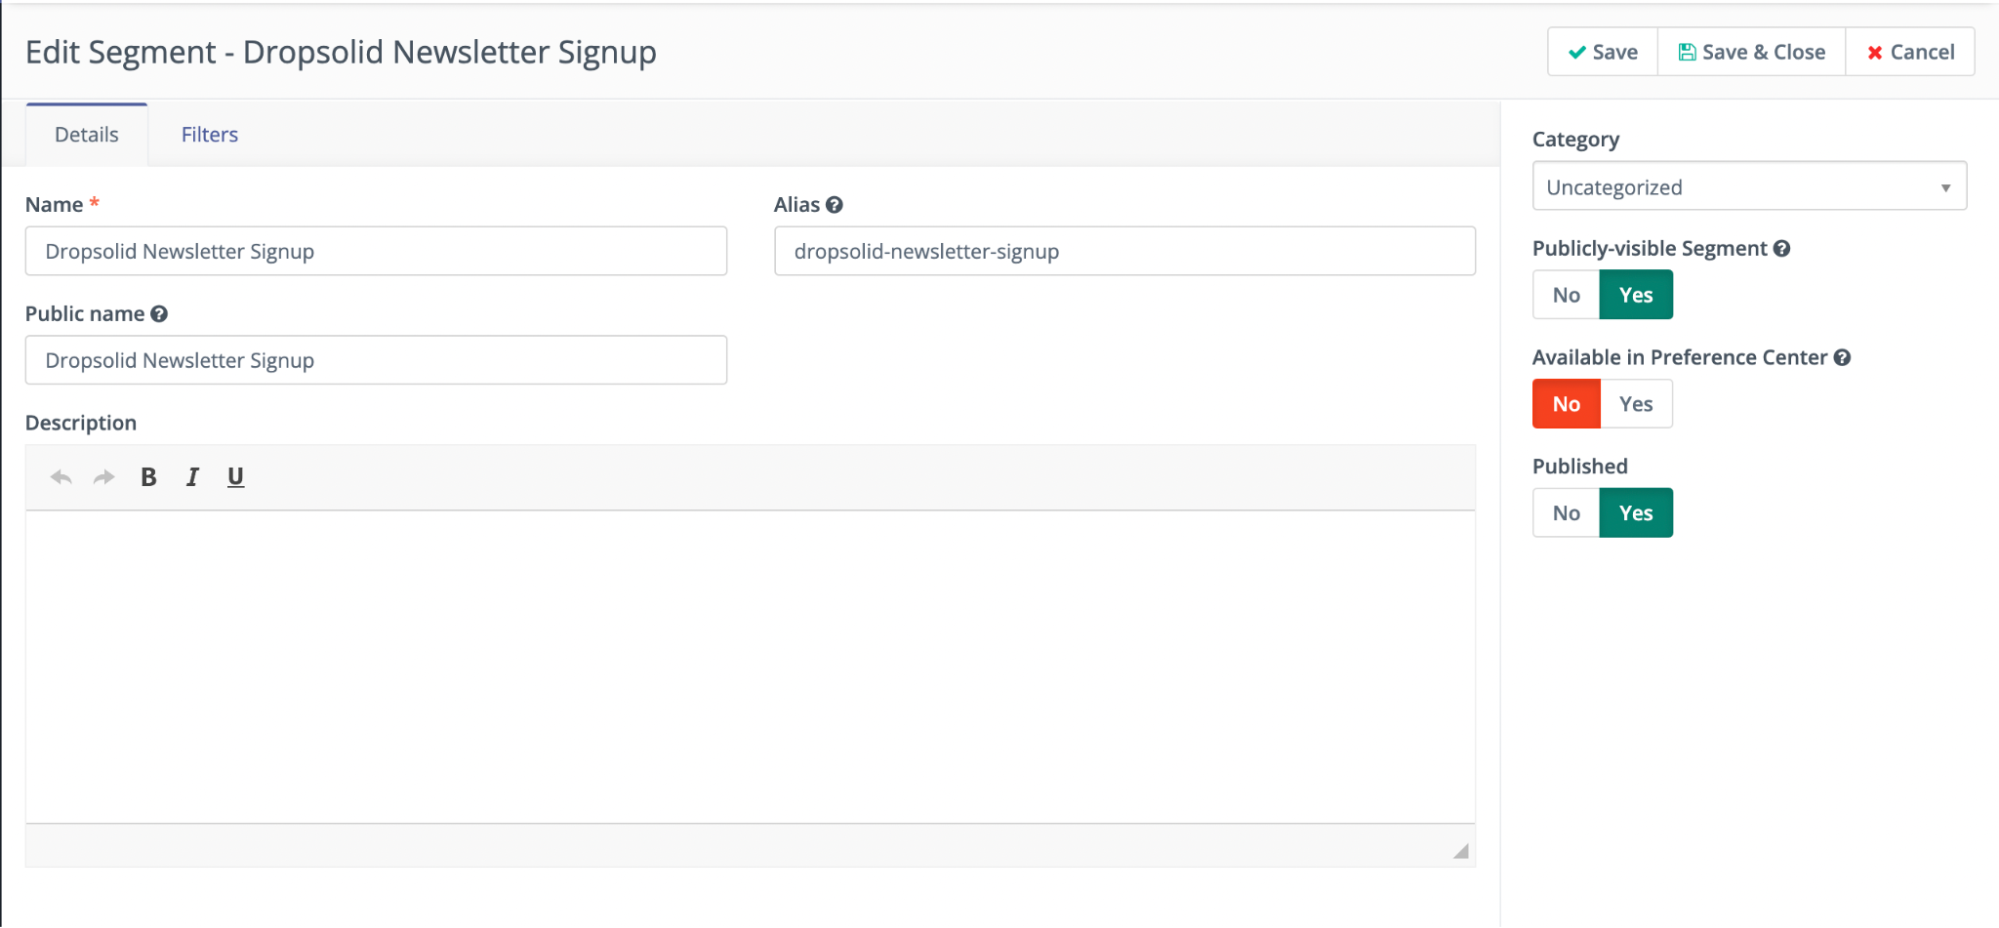
Mautic's segments enable you to categorize your subscribers based on specific criteria. To create a new segment, navigate to 'Segments' and click on ' New.'
You will have to create three segments for the newsletter campaign.
- Newsletter Pending Opt-In: To segment the users who have filled up the newsletter form but are yet to confirm their subscription.
- Newsletter Subscription: To segment the users who have verified their subscription and are ready to receive the newsletter.
- Welcome Email: This will segment the users who are interested in the newsletter and are ready to receive the welcome email.
After you have created all three segments, you can save and close the Segments window.
Additional Tips
You can use the “Available in Preference Center” option to allow the visitors to selectively unsubscribe from any segment. For one-time communications like “Newsletter Pending Opt-In,” you can select ‘No’ but for recurring communications like “Newsletter Subscription,” select ‘Yes.’
Step 4: Create The Emails
To create the Newsletter emails, navigate to the ‘Emails’ option in ‘Channels’ and click on ‘ New.’ Now, you will have to choose the type of email that you want to create.
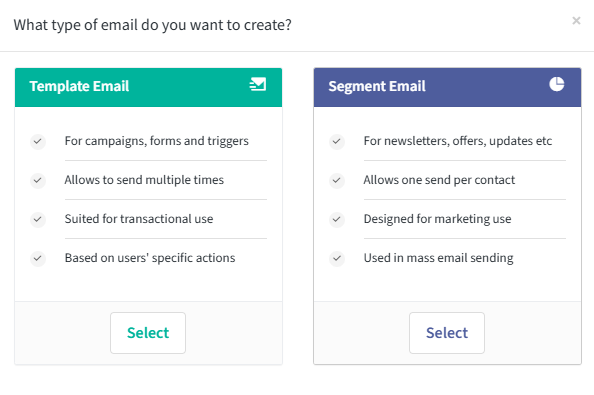
- Template Email
By default, template emails are transactional and are used in campaigns, form submit actions, and point triggers. You can send template emails to the same contact multiple times.
- Segment Email
By default, segment emails are marketing emails. The marketer assigns segments to the email to determine which contacts receive the communication. Each contact can receive the segment email only once.
For this campaign, we'll use a “Template Email.” Customize the email template using the ‘Builder’ option, where you can adjust the layout, add images, and include dynamic content like the subscriber’s name. Once you’ve finished designing, save and close the window.
We will create three emails for the entire newsletter campaign.
- Newsletters Opt-In Verification: This email will ask the visitors to confirm their interest in the newsletter subscription.
- Newsletter Welcome Email: This email will welcome the users to the campaign by providing them with a free ebook.
- Newsletter Email: This email will send the newsletter to all the subscribed users.
Step 5: Create The Campaigns
Using Campaigns in Mautic, you can automate the entire newsletter flow. Navigate to “Campaigns” in the main dashboard and choose “New.” After naming the Campaign, click on “Campaign Builder.” Select the form you created in Step 1 as the “Contact Source.”
Now, you can perform three actions based on the form submission.
Select “Action” and choose “Modify Contacts Segments.”
Select the “Newsletter Pending Opt-In” in the “Add contacts to selected Segment(s)” option. This will allow Mautic to automatically segment the users who have filled out the newsletter form.
Enable Double Opt-In Verification
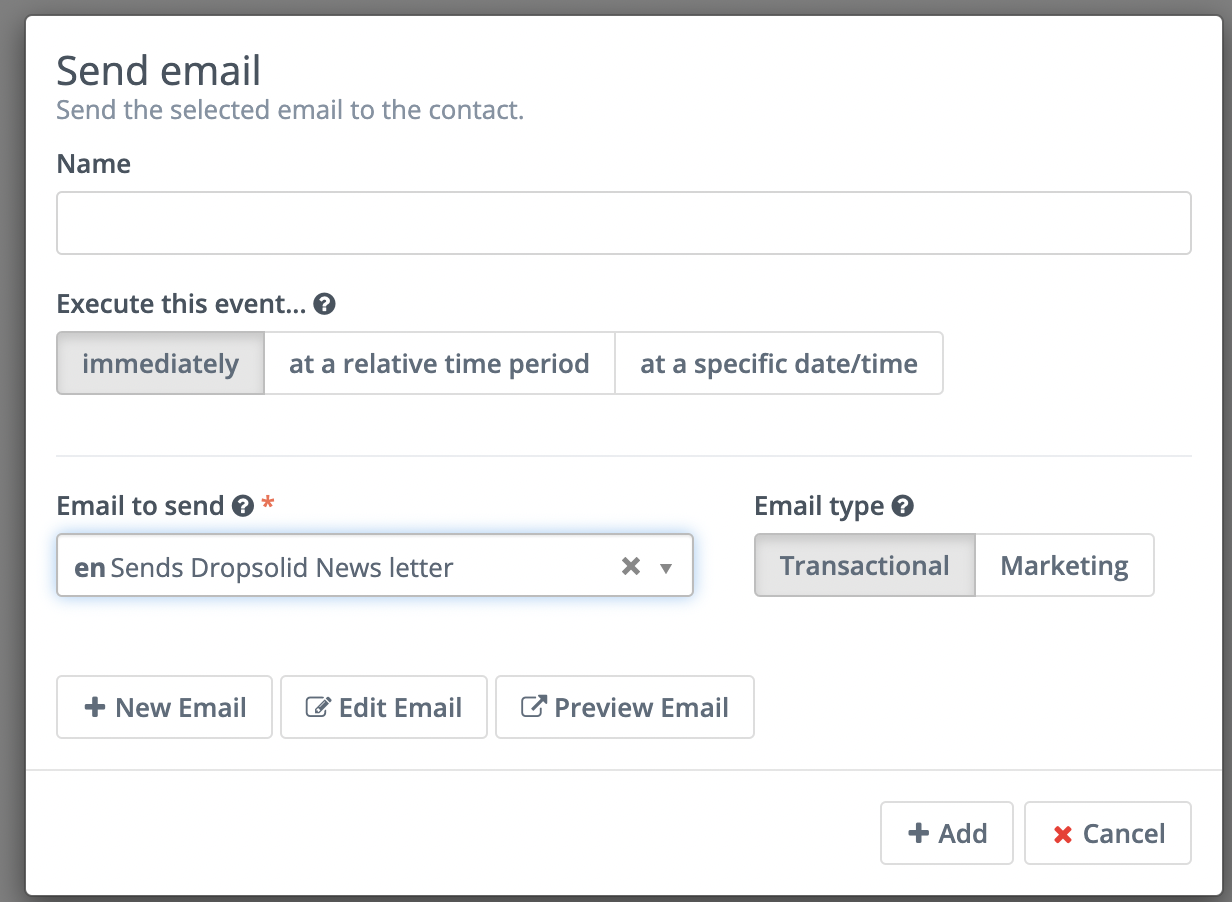
Select “Actions” and choose “Send Email” to send the double opt-in verification email.
Choose the double opt-in email that you created in Step 4. Now choose “Decision” and select the option “Visits a Page.” Here, select the page that you added in the double opt-in verification email.
Depending on whether the user clicks on this link, specify two actions.
- The first action involves modifying the contact’s segment. Here, you will remove the user from the “Newsletter Pending Opt-In” segment and add them to the “Newsletter Subscription” and “Welcome Email” segments.
- If the user does not click on the link in the double opt-in verification email, you will have to specify another action that will resend the email to the user after a delay of 2 days. You can specify the delay using the “within a relative time period” option.
Save and close the campaign builder.
Send The Newsletter
Now, you have to create a second campaign to send the newsletter to all the users within the “Newsletter Segment.”
Repeat the above steps and choose “Contact Segments” as the “Contact Source.” Here, you have to choose the “Newsletter Segment” for sending the newsletter. Now, choose “Send Email” under the “Actions” tab. Choose the newsletter email that you created earlier.
Save and close the campaign builder.
Step 6: Test The Form
Before going live, test your form to ensure it’s working properly. Submit the form on your website and confirm that the data is successfully captured in Mautic. Additionally, use the “Preview” option in forms to verify its functionality.
If you encounter issues like form submission errors or validation problems, review your form settings and embed code. Make sure all required fields are correctly configured and that validations are properly set up.
Step 7: Monitoring Subscriptions In Mautic
To view form submissions, go to the “Submissions” option under “Forms.” Here, you can see all the data collected through your subscription form.
Navigate to “Segments” to manage your segments. You can view and edit the contacts in each segment and adjust the segment filters.
Mautic's reporting tools allow you to create custom reports and dashboards to monitor the performance of your newsletter campaigns.
Best Practices For Launching Highly Engaging Newsletters In Mautic
You can improve your newsletter campaigns in Mautic by following the given best practices.
- Provide A Clear Value Proposition
Make sure subscribers understand the benefits they’ll receive from your newsletters. Highlight this value proposition on the subscription form and in the welcome email.
- Build Effective Signup Forms
Create forms that are easy to complete, with minimal fields and a clear call-to-action. Place them prominently on your website to maximize visibility.
- Offer Additional Signup Incentives
Encourage more users to subscribe by offering incentives such as free downloads, exclusive content, or discounts.
- Personalization And Relevance
Utilize Mautic’s dynamic content features to personalize your emails by including the subscriber’s name and tailoring the content to their interests.
- Focus On User Experience
Design emails to be visually appealing and easy to read on all devices. Ensure that links and buttons are easy to click, and that the content engages your audience.
- Consistent Follow-Up Strategy
Maintain regular communication with subscribers, including engagement emails to re-engage inactive users and keep them interested.
- Analyze And Improve
Regularly review analytics and reports to identify areas for enhancement. Test different email subject lines, content, and send times to optimize performance.
- Privacy Compliance
To ensure compliance with the General Data Protection Regulation (GDPR), include a checkbox on the subscription form for explicit user consent to receive your newsletter.