Getting started with Mautic
Estimated Reading Time: 14 MinutesTable of Contents
- What is Marketing automation?
- What is Mautic?
- What does Mautic offer?
- How to install Mautic?
- How to set up basic configurations in Mautic?
- What are cron jobs and how to set up cron jobs on Mautic?
- How to add tracking pixel in Mautic
- How to use Contacts in Mautic?
- How to use Channels in Mautic?
- How to use Segments in Mautic
- How to create your first Mautic Campaign?
- Exploring other features in Mautic and how they work together
- Have any questions?
What is Marketing automation?
Marketing automation is the use of software to deliver personalized messages to customers and leads. The software allows you to create a dynamic series of messages to send to your contacts. Marketing automation offers an exciting opportunity for greater efficiency, cost reduction, and an enhanced customer experience.
What is Mautic?
Mautic is the world’s first open-source marketing automation system.
What does Mautic offer?
- Campaign Management
- Customer Lifecycle Management
- Contact Management
- Integrations and Plugins
- Reports and Dashboards
Intelligent marketing automation means:
- Being able to make real-time, data-driven decisions that have a significant impact on the performance of existing marketing efforts and future strategic planning.
- Having the required information to facilitate post-campaign performance reviews. These help you ensure that goals have been met, and if they have not been met, understand why, and how to improve future efforts.
- Providing insight and actionable intelligence which is invaluable for goal setting, campaign planning, and understanding of what ‘success’ looks like for you.
Do I need to learn all of that at once?
No, Mautic is easy to learn and get started with. You can start using one part, and gradually expand what you use over time. That’s the beauty of Mautic, it can evolve with you on this journey.
How to install Mautic?
You can manually install Mautic by downloading the latest version of the marketing automation software, or through a semi-automated process offered by third party tools such as Softaculous, Bitnami, and Digital Ocean.
If you install Mautic manually, you will need to upload the Mautic package (a zip file) to your server; unzip the files, and then navigate to that location in your browser.
You will find Mautic has a very easy to follow the on-screen installation process here.
How to set up basic configurations in Mautic?
Awesome! You've downloaded your marketing automation tool. That's a great first step, but now you wonder where to go from here. Follow this guide to set up and configure using your shiny new toy!
What are cron jobs and how to set up cron jobs on Mautic?
Mautic requires a few cron jobs to handle some maintenance tasks such as updating contacts or campaigns, executing campaign actions, sending emails, and more. Without them, nothing will happen in Mautic - so you must set them up! Here is the documentation on how to set up the necessary cron jobs.
How to add tracking pixel in Mautic
If you are using CMS platforms like Wordpress there are lots of plugins which make the implementation of tracking super easy. Mostly you just need to copy and paste your Mautic domain and the plugin will do the rest.
Otherwise, to enable Mautic to track website activity, you need to implement a tracking pixel. To find your tracking pixel, open Mautic and go to Settings → Configuration → Tracking settings.
You can either use the Javascript shown above and copy that into the HTML of your website or you can just use a simple tracking pixel by replacing the domain and the path to your Mautic If you do not allow Javascript on your website.
Anonymize IP
To be compliant with the GDPR you need to anonymize IP addresses. This is turned on by default.
How to use Contacts in Mautic?
Contacts are the central factor of a marketing automation platform. These are all the individuals who have visited your websites or interacted with you in some way.
Here is a walkthrough on how to quickly add, view and interact with your contacts in Mautic:
- Click Contacts in the Main Menu.
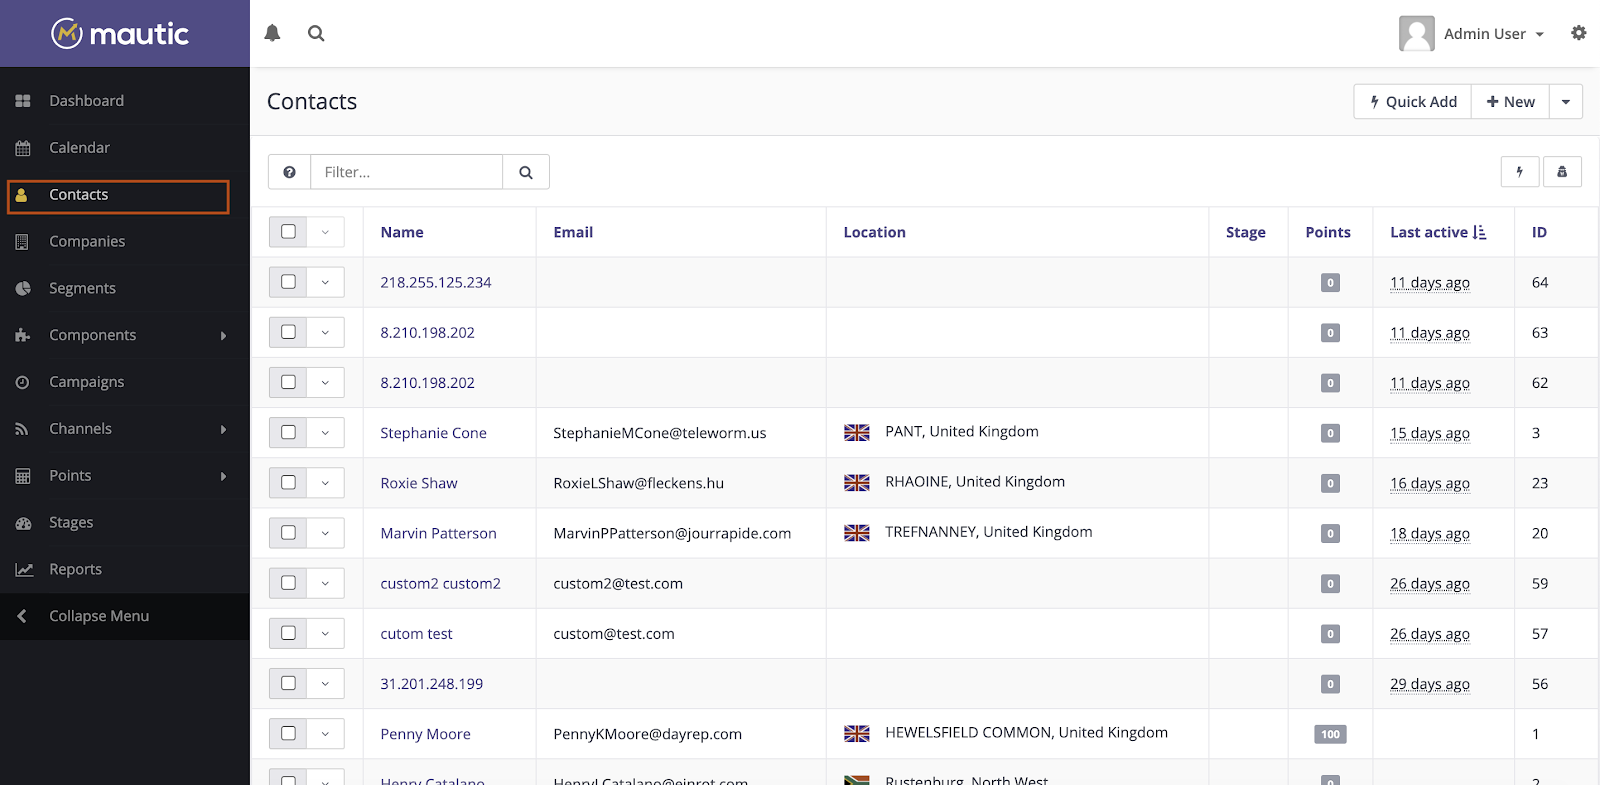
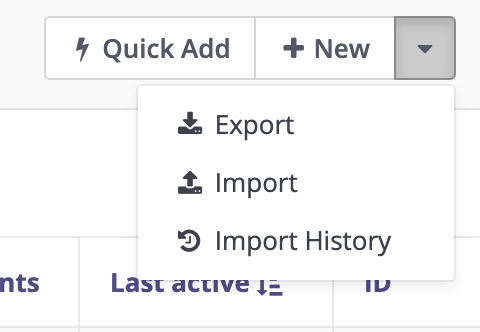
- On the right side of this page, you can manually add contacts one at a time, import contacts via a CSV file (must be encoded in UTF-8), or export all your contacts to a CSV/spreadsheet.
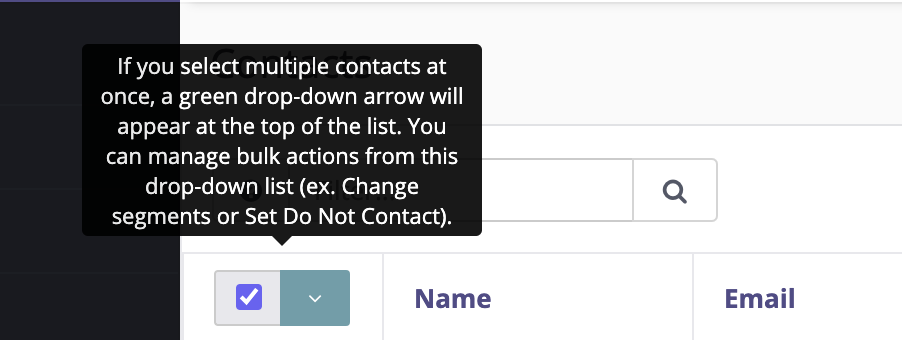
- Select a contact and click the green arrow. This is where you can manually update one or more contact’s campaigns, segments, stages, and contact status. You can also export the selected contacts or delete the selected contacts.
Here is a documentation on how to interact with, add, manage, import your contacts - both visitors and standard contacts, and also manage segments, custom fields, and message queues in Mautic.
How to use Channels in Mautic?
Channels are the delivery pathways (marketing messages, email, web notifications, text messages, and social media) you will use from Mautic to publish your components.
The pathways you choose should be selected based on the ideology of sending the right content, to the right target persona, at the exact time they are searching for it based on their buying Journey

Here is the documentation on how to use channels (marketing messages, emails, web notifications, text messages, and social monitoring) in Mautic.
Note: All of these must be created or configured before you can use them in a campaign.
How to use Segments in Mautic
Segments provide ways to easily organize your contacts. Once contacts are known, you can begin to create segments or lists of people based on common interests, location, how they came into Mautic, or even how they’ve interacted with you over time.
These can be done manually or completely automated through form and campaign actions.
Here is a walkthrough on how to create a segment that is going to be empty until unknown site visitors are identified by filling out a form and submitting their information.
- Click on Segments in the main menu.
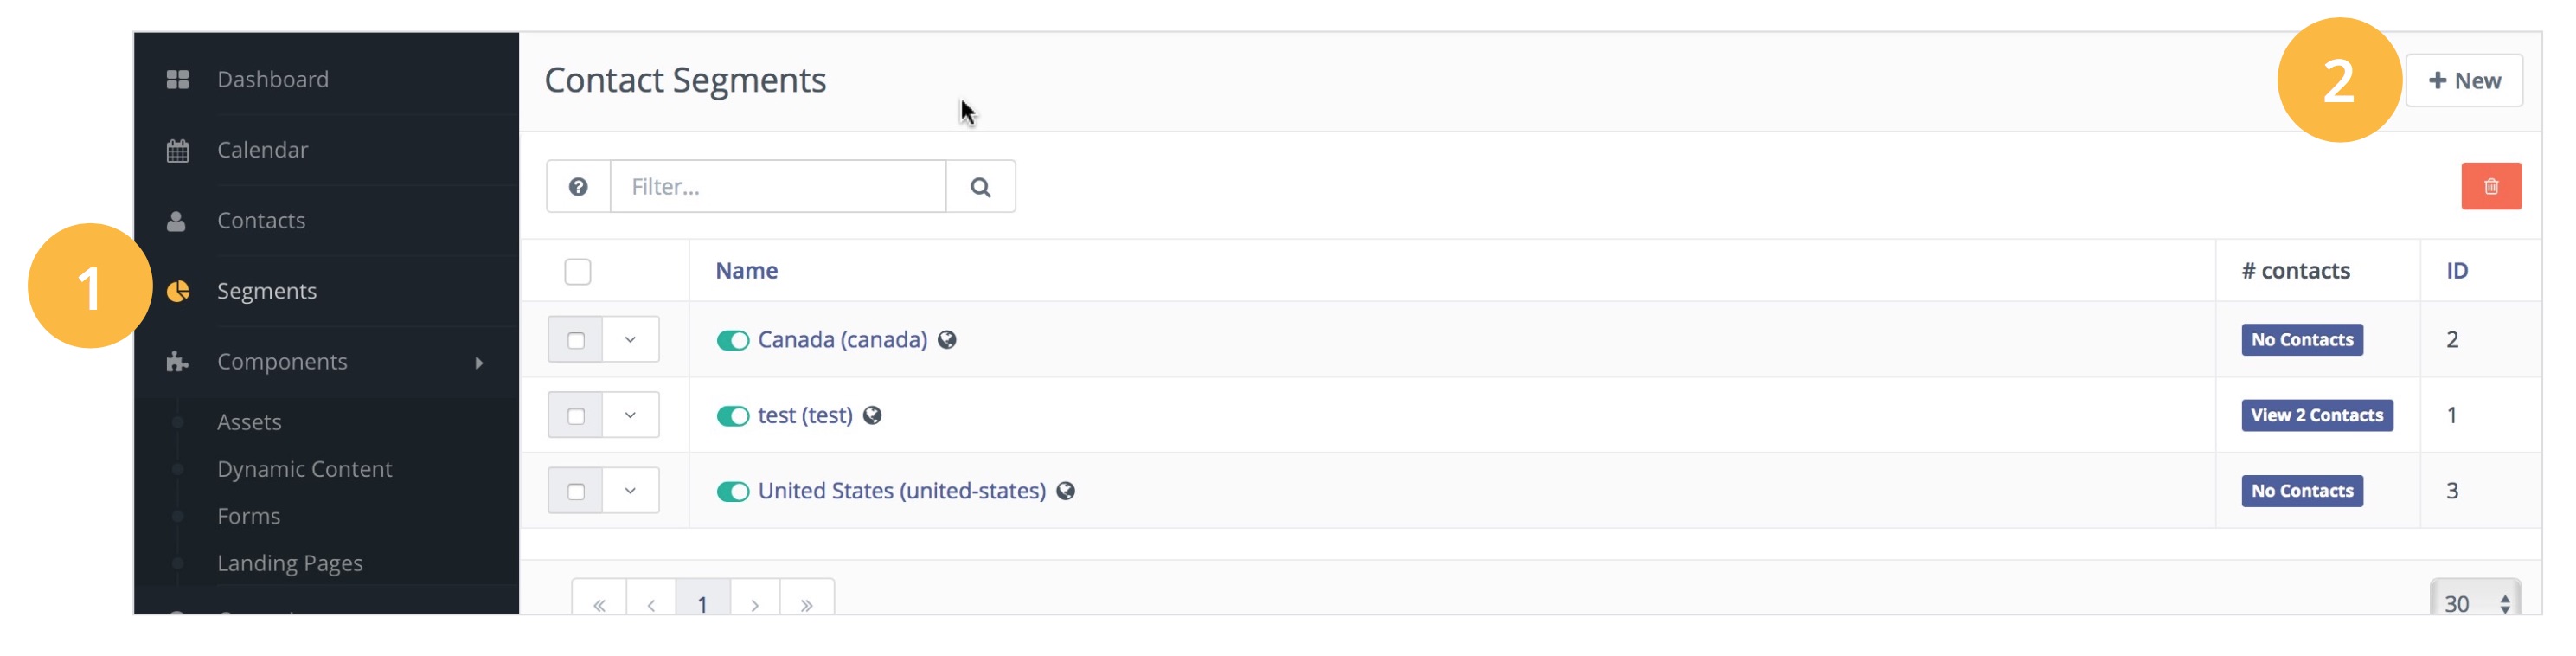
- Click New and call it First Contact.
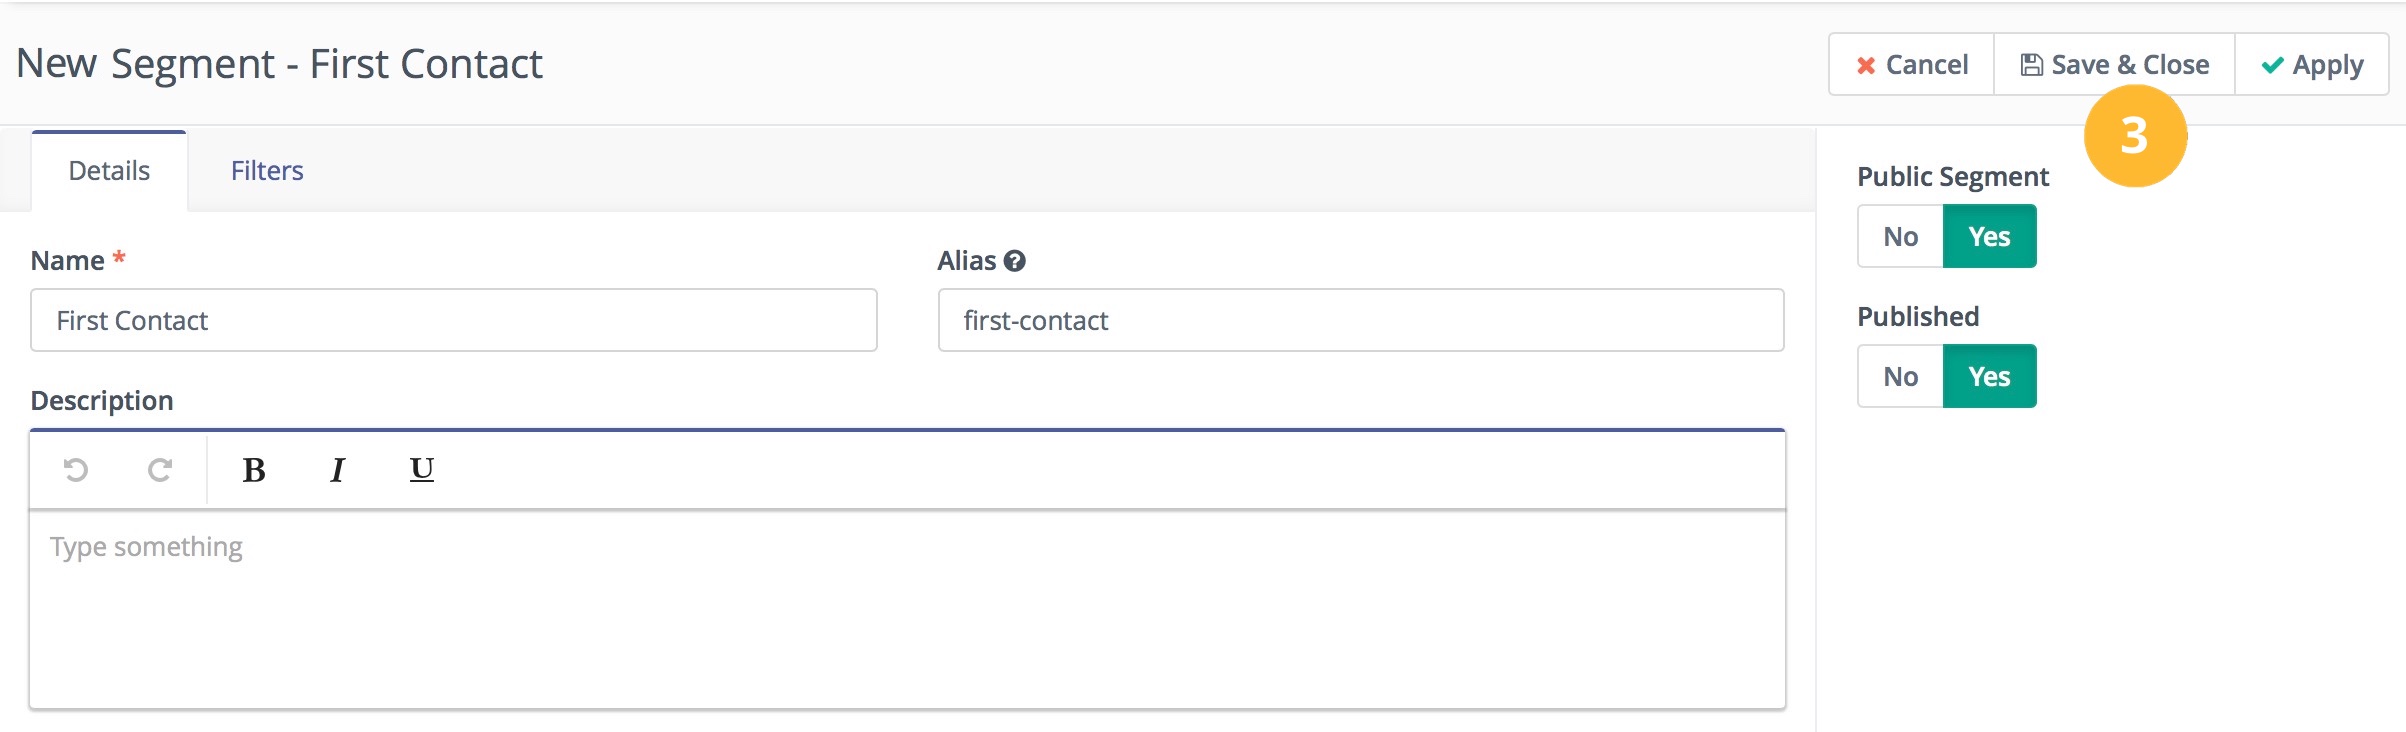
- Click Save and Close.
How to create your first Mautic Campaign?
Campaigns are used to create an automated workflow to assist with your marketing efforts. It consists of various external points of contact which will engage your contacts. These engagements can be created to occur on predefined time intervals or in response to specific contact actions.
Components are the deliverables you will create in Mautic to be used in your marketing campaigns (assets, landing pages, forms, thank you pages, calls-to-action, and dynamic content).
Exploring other features in Mautic and how they work together
Creating campaigns involves picking a name, creating a description, and defining the segments to associate with the campaign. These campaigns can then be assigned a category and defined publishing information.
To set up a Campaign based on information coming from a form completed by a visitor, you’ll need to execute the following tasks:
- Create a form that will be embedded on your landing page.
- Set up a simple landing page with compelling copy and imagery related to your offer.
- Create a simple thank you or follow-up email that will be sent once the form has been submitted.
- Design a campaign that will perform actions when the form is submitted.
- Test the form.
- Track the performance of Mautic campaign.
- Create a report.
- Review the results on your dashboard.
1. Create a form that will be embedded on your landing page
We’re going to create a simple form for this exercise with just a first name and an email address. Forms in Mautic can ask for virtually any information, you’ll just need to identify the fields for storing the information.
For this, you can just use the first name and email fields that Mautic provides.
- Click on Components and then Forms.
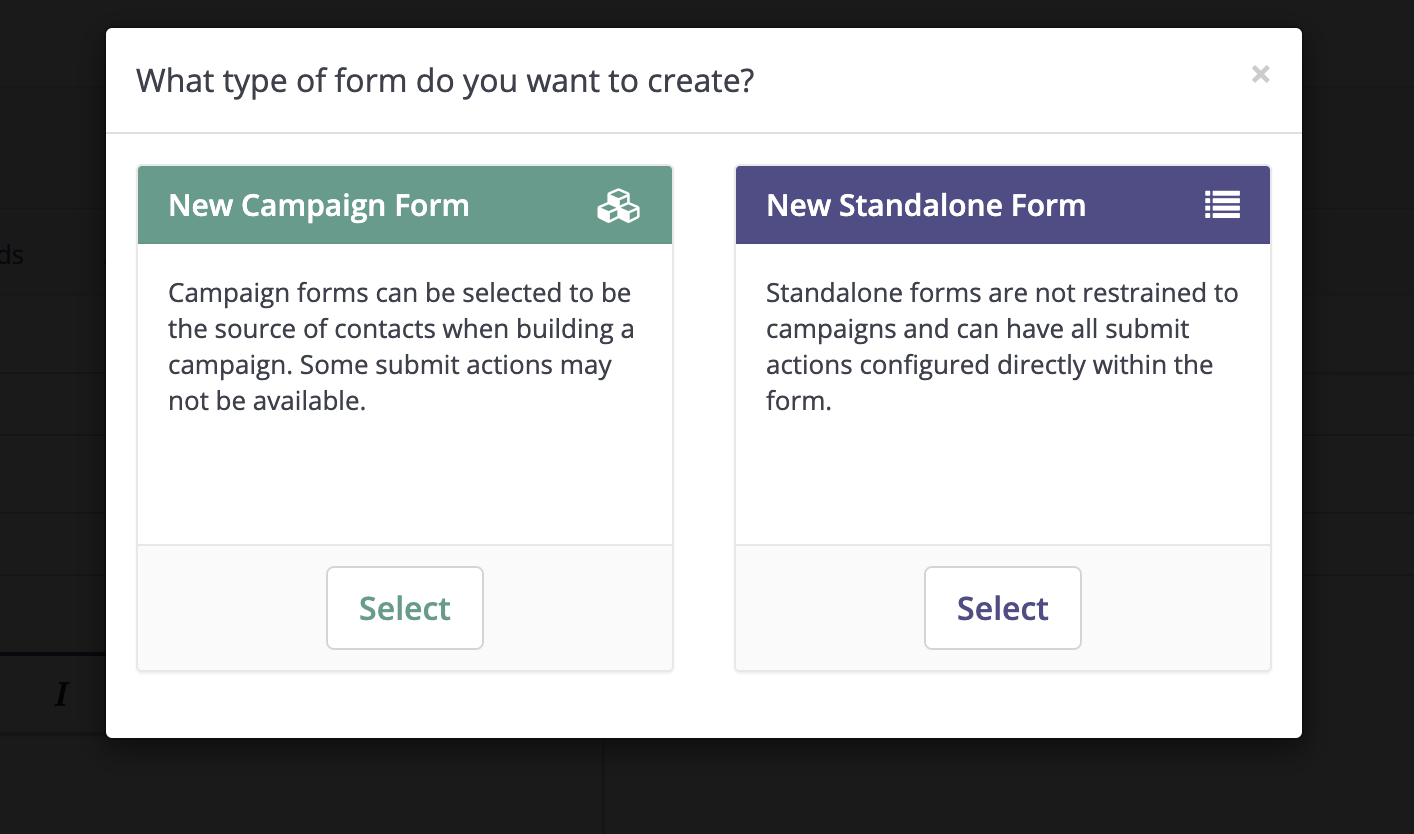
- Click New.

- Select Campaign Form.
- Enter First Contact for the name. Leave the rest of this screen as is.
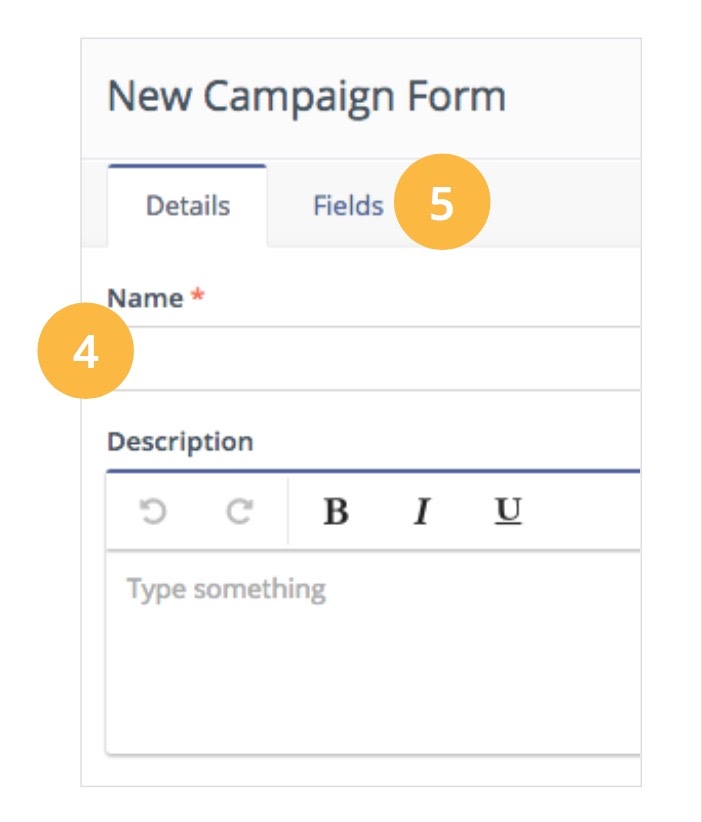
- Click on Fields.
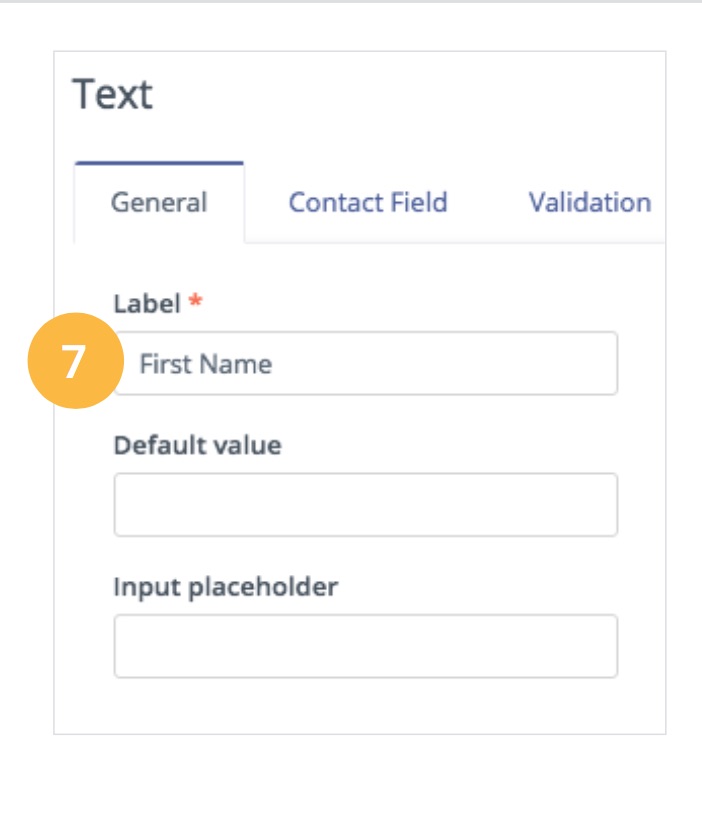
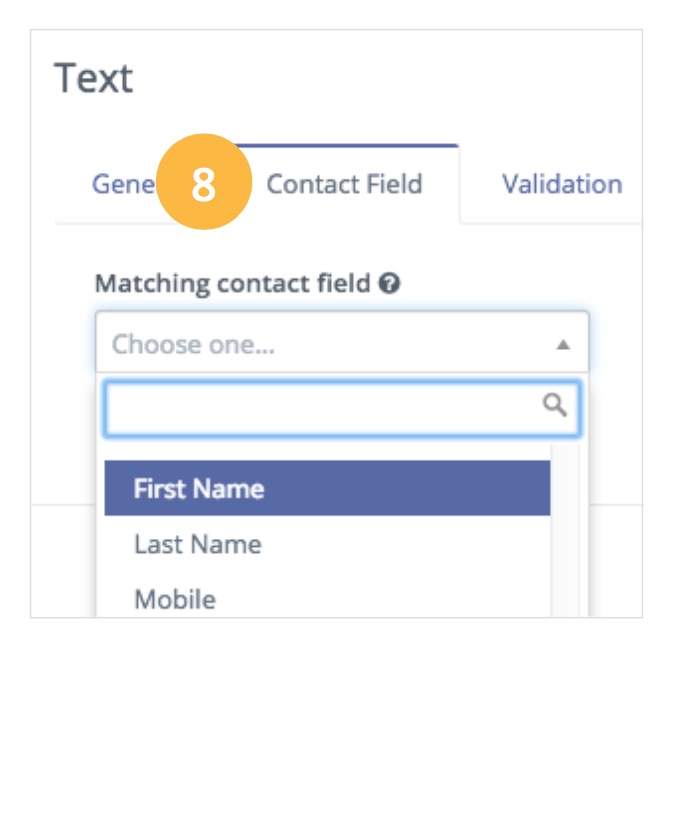
- To add a new field, click on Add a field, and select Text. You’ll notice that certain fields are required ( * ). In the Label field, type First Name.
- Click on Contact Field and in the dropdown, select First Name.
- Click Add.
- Click Add a field and select Email.
- Enter Email for the label.
- Click Add (the contact field is selected for you in this case)
- Click Save and Close
2. Set up a simple landing page
- Click on Landing Pages.
- Click New.
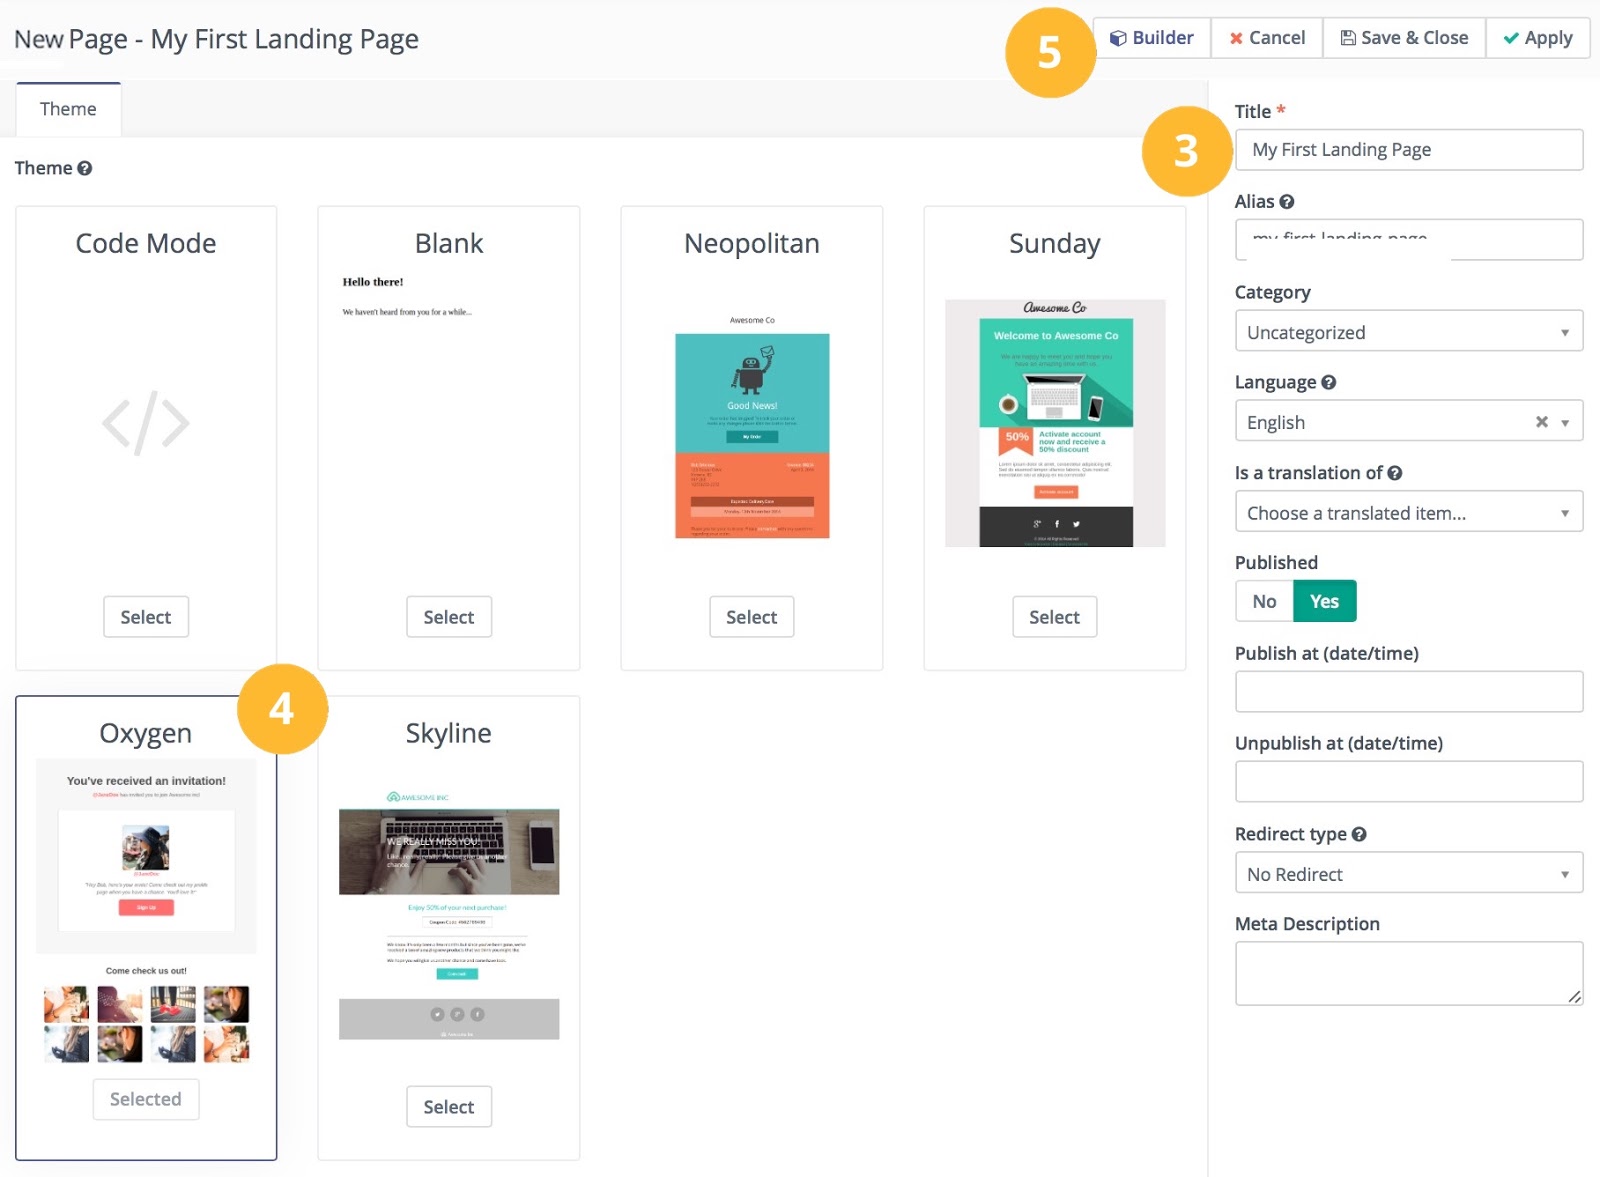
- On the right side, enter My First Landing Page for the title.
- Select the Oxygen template.
- Click on the Builder button.
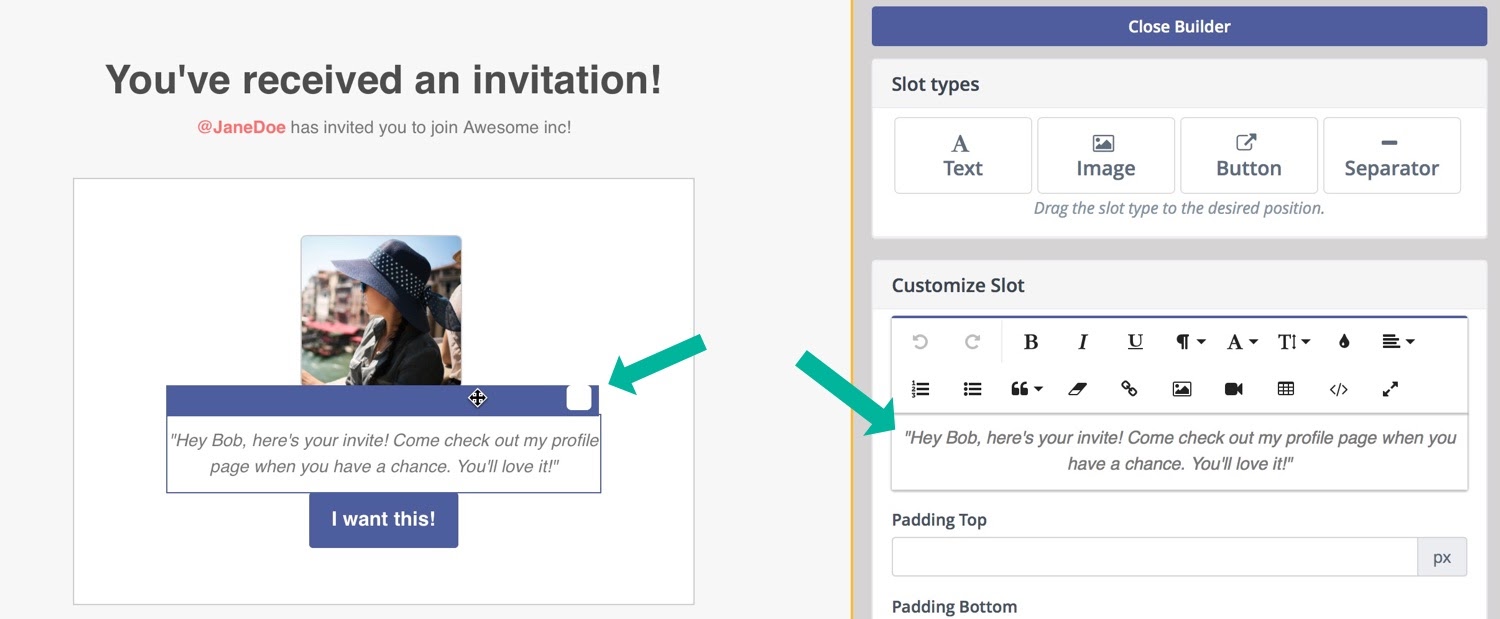
- Click on the text field. A box will appear and the text will be in the editing window on the right.
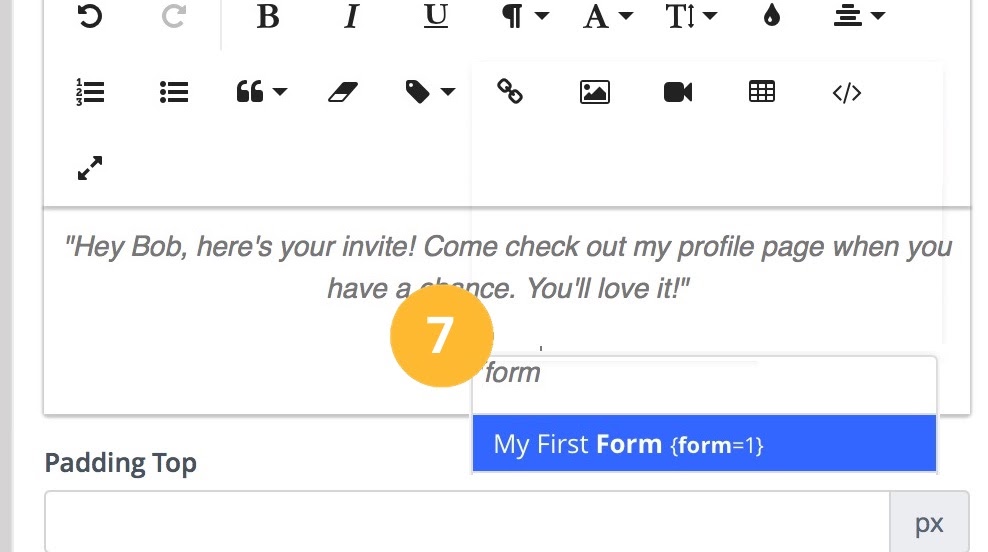
- Let’s insert the form token on your landing page, type { (shift square bracket – top right side of the keyboard), in the editor menu. Click on My First Form.
- Click Save and Close.
- Click on the Public Preview link (on the right side of the page). Confirm that the form is embedded in the page but don’t fill in the form yet.
3. Create a thank you email
One of the most common ways to follow up with the people who fill in your forms is to send them an email with a white paper or other downloadable asset attached.
- In the main menu, click on Channels and then Emails.
- Click New.
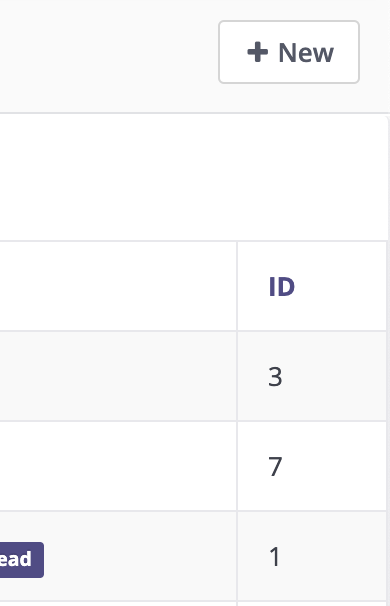
- Select New Template Email. You’ll notice that we have the same templates available in Emails as we did in Landing Pages. You can use a template, create your own, or simply create an email with no template.
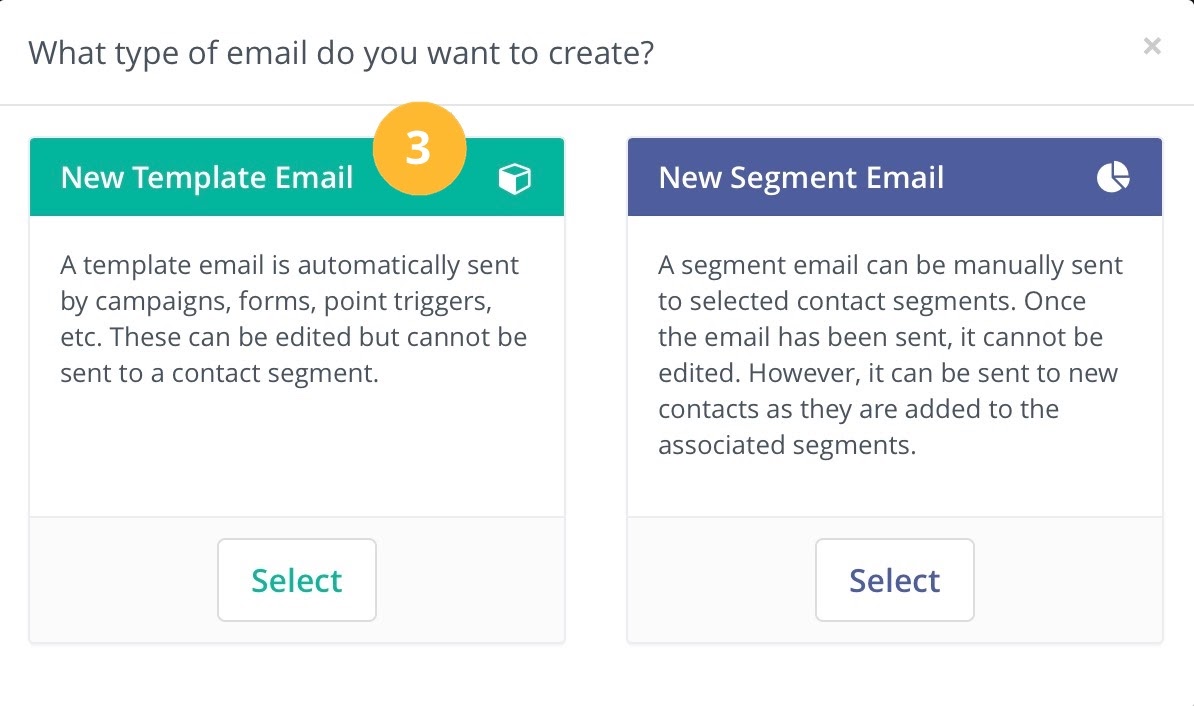
- Select the Blank template for this exercise.

- In the subject field, type Thank you for requesting this information!
- For the Internal Name, type My First Email.
- Click on the Builder tab.
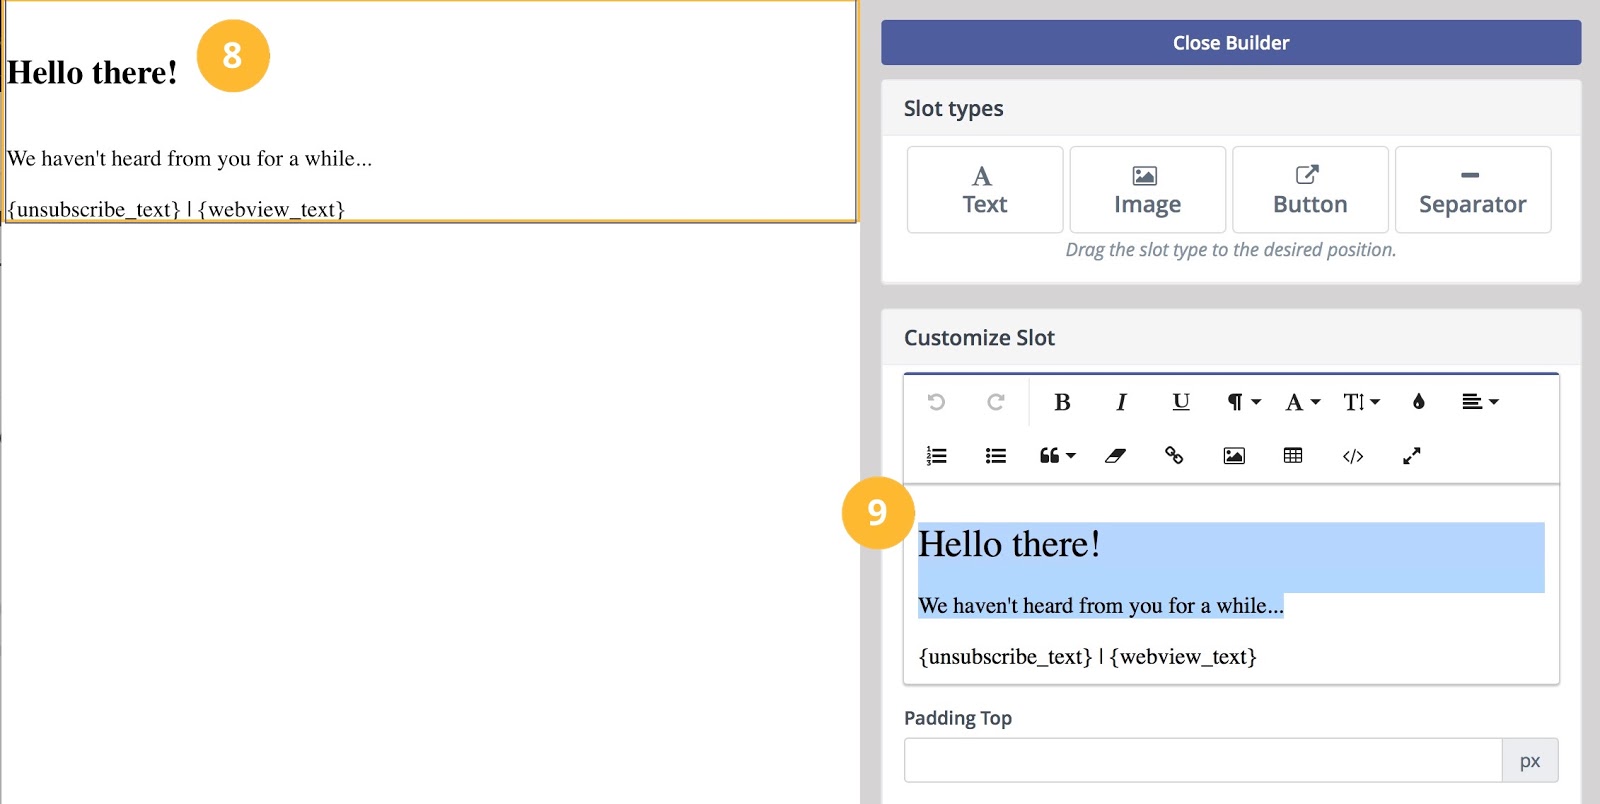
- Click anywhere in the text.
- On the right side in the editor window, highlight the text in the email but not {unsubscribe_text} | {webview_text}, and remove it by pressing delete or backspace.
- Type Hi and then add a space to separate your greeting from the recipient’s name.
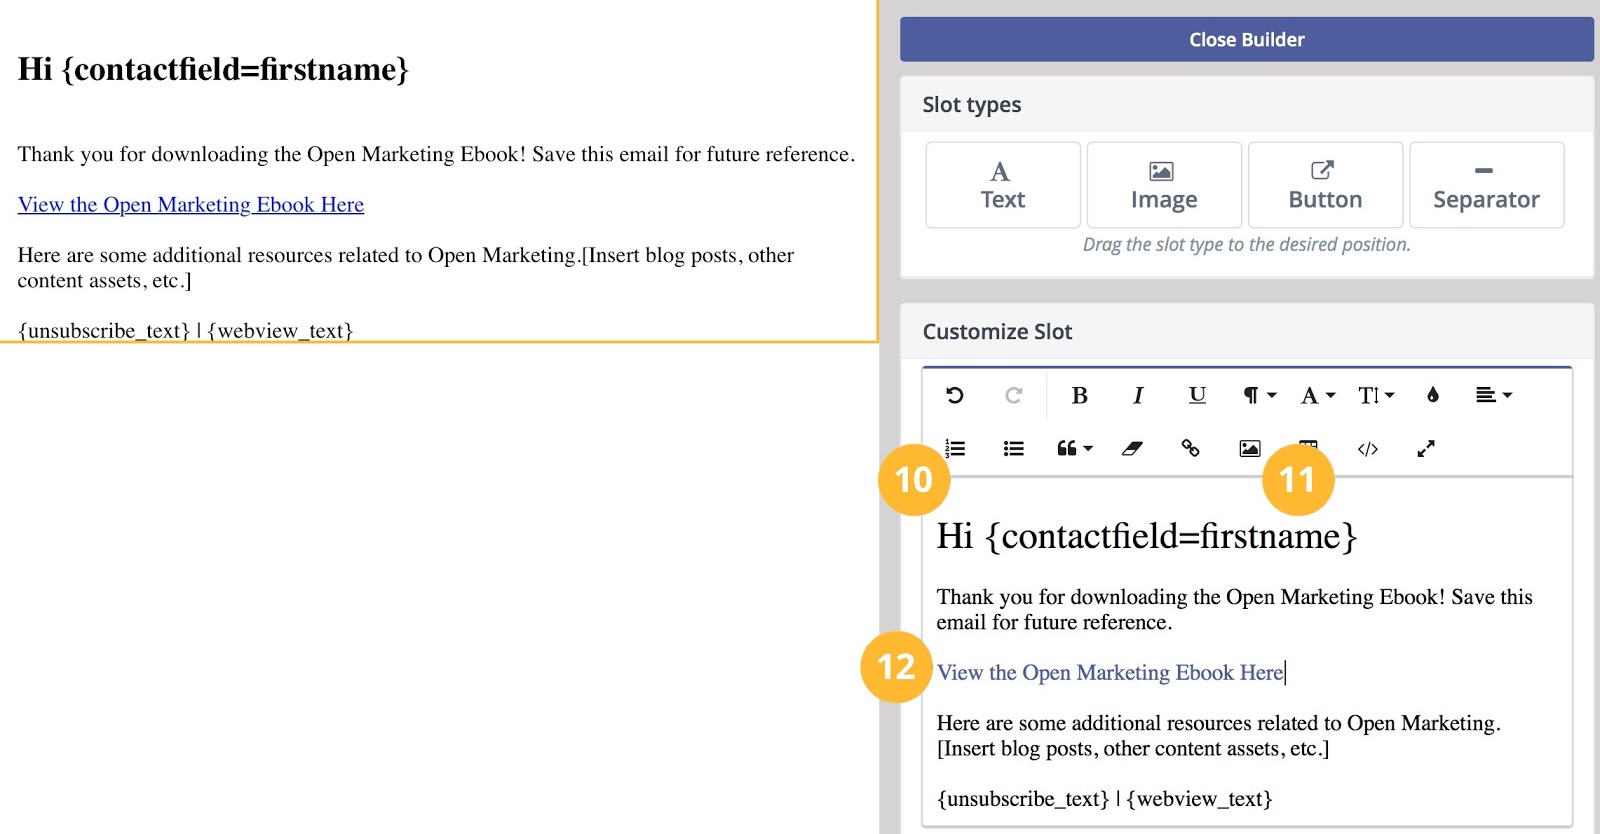
- Let’s personalize this email using tokens. To use these tokens, type {, and a list of tokens you can use will be displayed. Type fir after the { and you’ll see the token for a contact’s first name. Click on that and it will be translated to {contactfield=firstname}. You can insert the value of any field in Mautic this way.
- Type the following into the email: Thank you for downloading the Open Marketing Ebook! Save this email for future reference. View the Open Marketing Ebook. Here are some additional resources related to Open Marketing(Insert blog posts, other content assets, etc).
- Click Close Builder.
- Click Save and Close.
4. Campaign Setup
Now that you have your form; landing page and email created, we can configure our first campaign. Campaigns are where we bring all of our work together! Campaigns are very flexible. They are made up of conditions, decisions and actions.
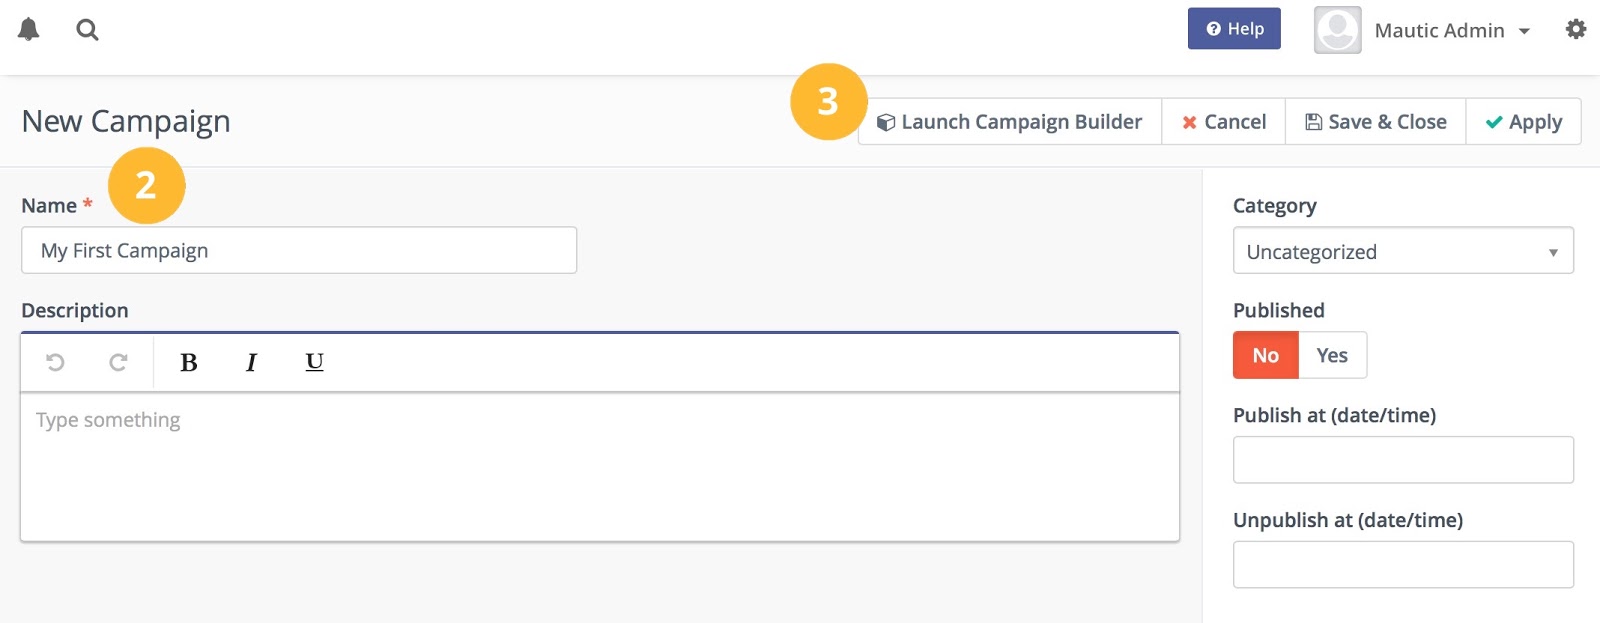
- Click on Campaigns and click New.
- In the Name field type: My First Campaign.
- Click on Launch Campaign Builder.
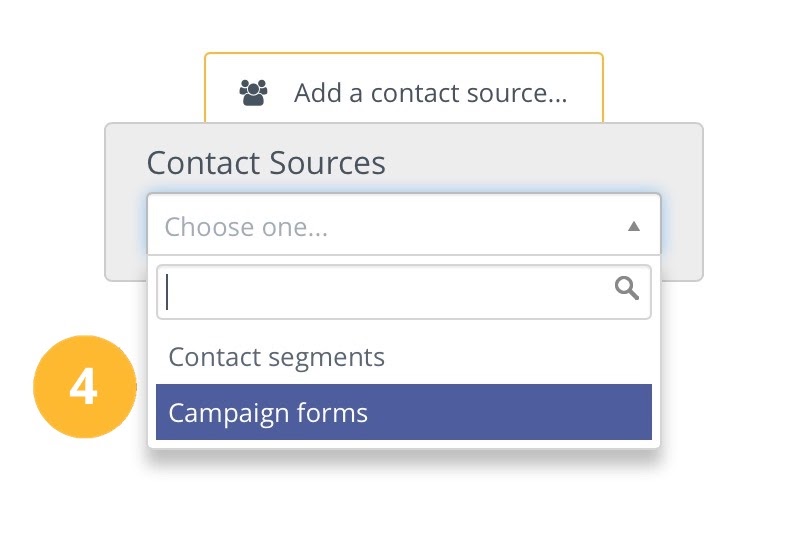
- Campaigns begin with a Contact Source. This is either a segment or a form Select Campaign forms.
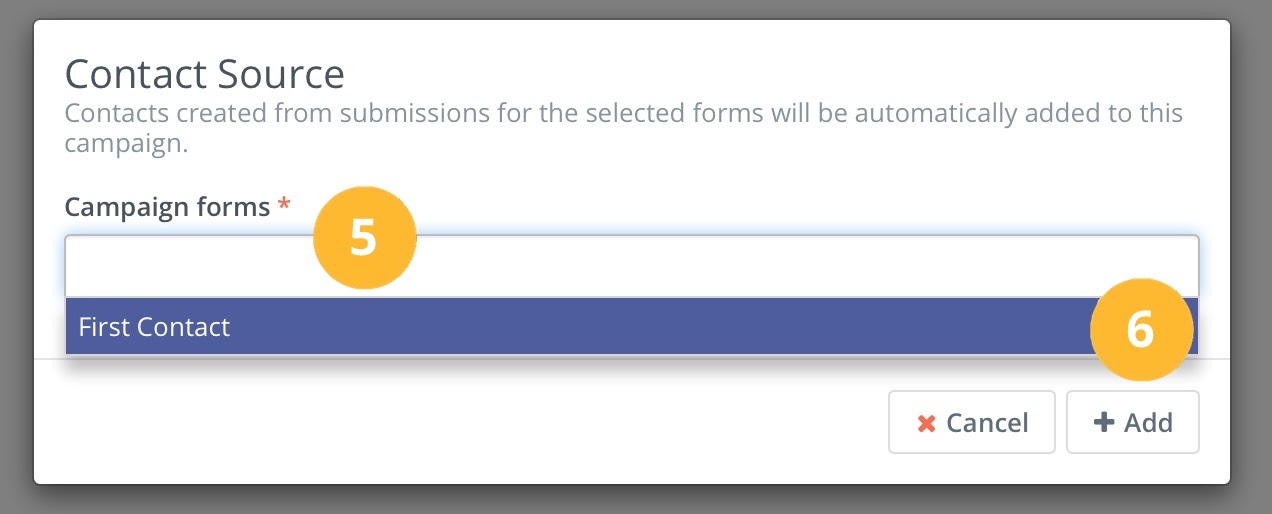
- Click in the field and select the form you created earlier.
- Click Add.
- Click on the grey semi-circle connector.
- Click the Action Select button.
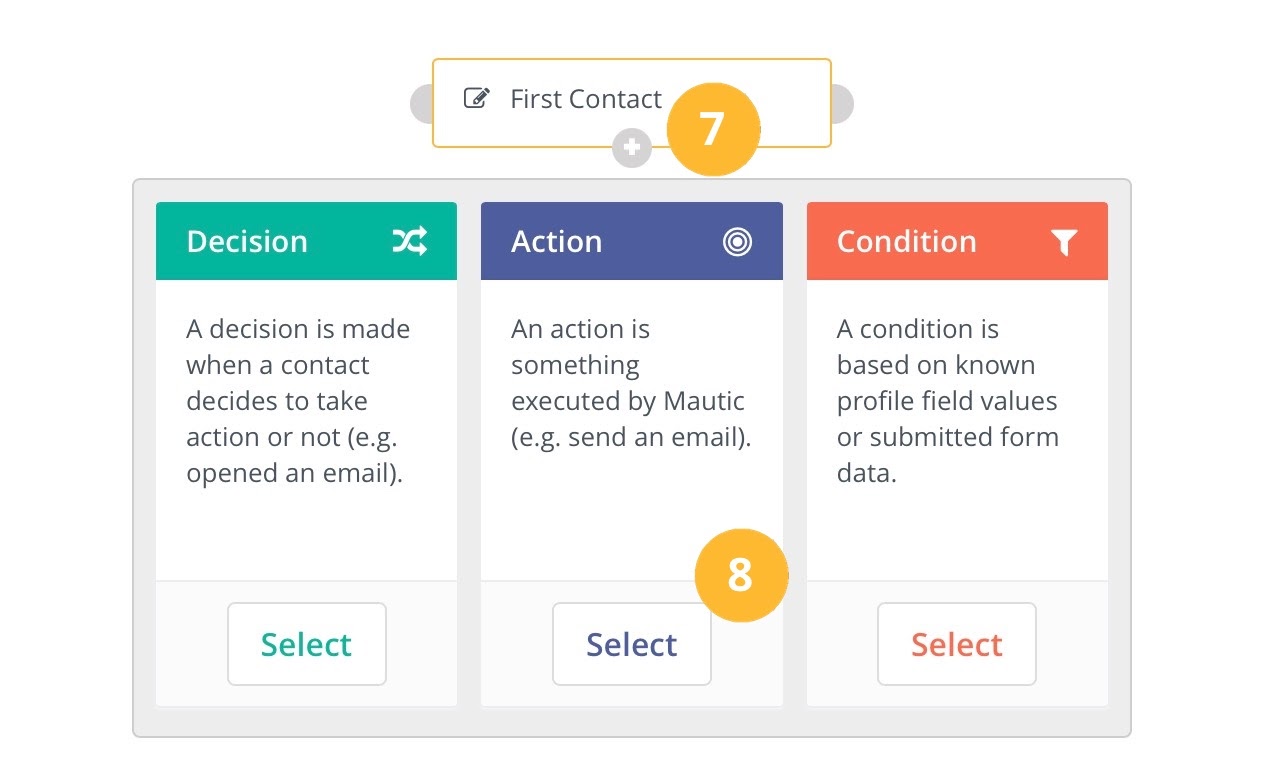
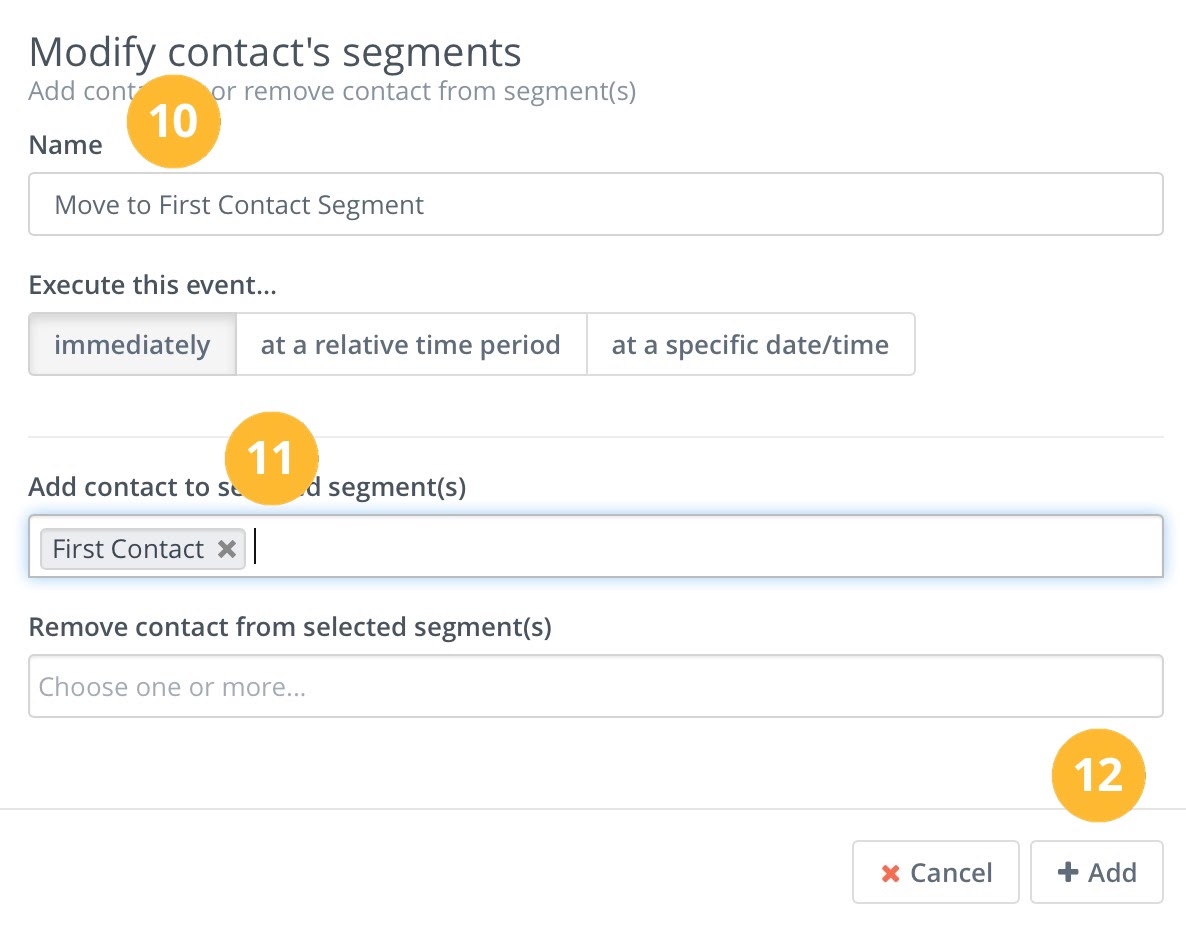
- Click on Modify Contact’s Segments.
- Type Move to First Contact Segment in the Name field.
- Click in the Add contact to segment field and select the First Contact Segment.
- Click Add.
- You will notice a line drawn from between the two boxes. This is called connector. It is drawn between the anchors on each box.
- Hover over the anchor on the upper box and click. Select Action and then Send Email.
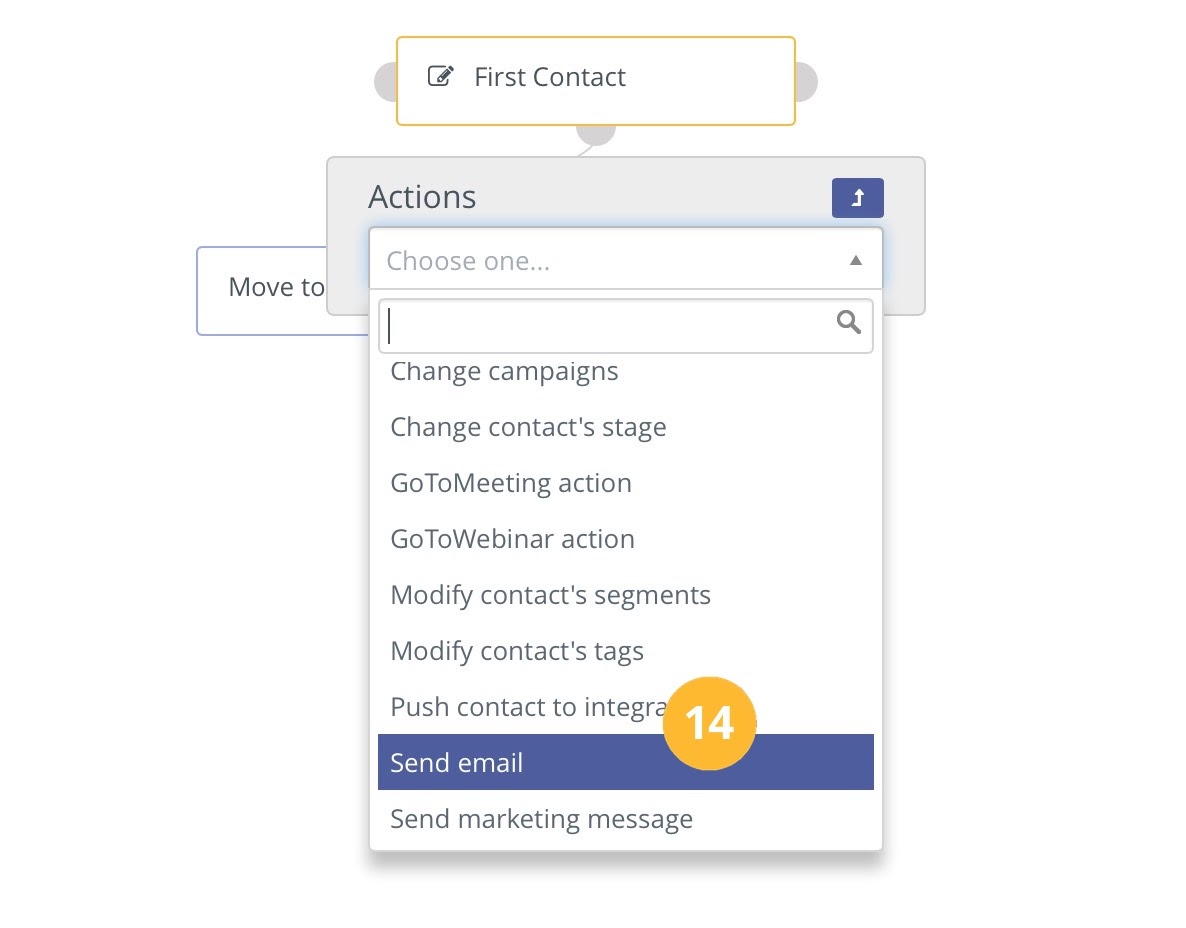
- Name the action Send 1st Email.
- Select My First Email from the Email to Send dropdown.
- Click Add.

- The last step is to add 10 points to their profile if they open the email. Click on the anchor on the Send First Email box.
- Select Decision. Select Opens Email from the dropdown.
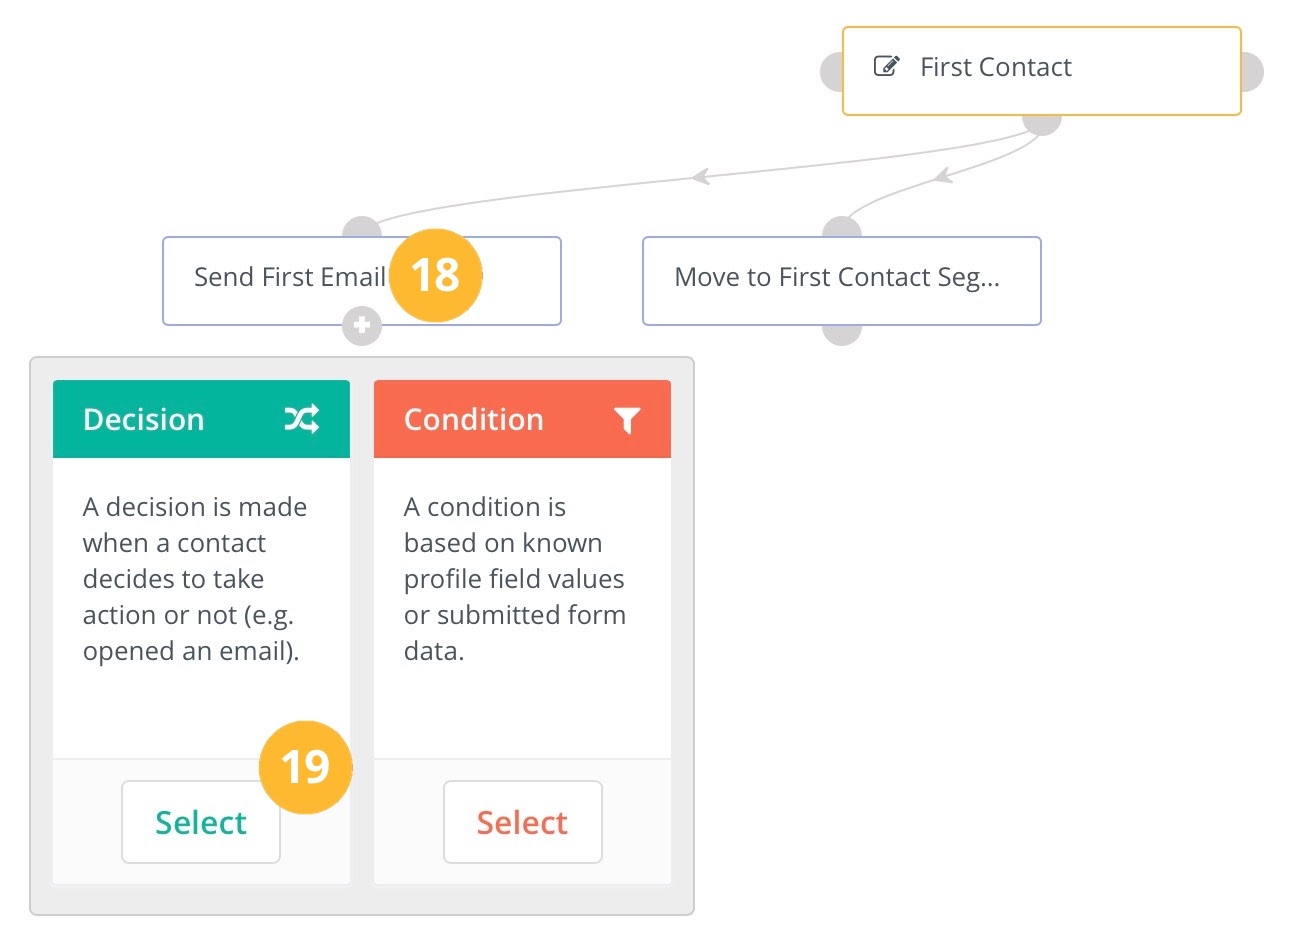
- Enter Opens 1st Email in the Name field and click Add.
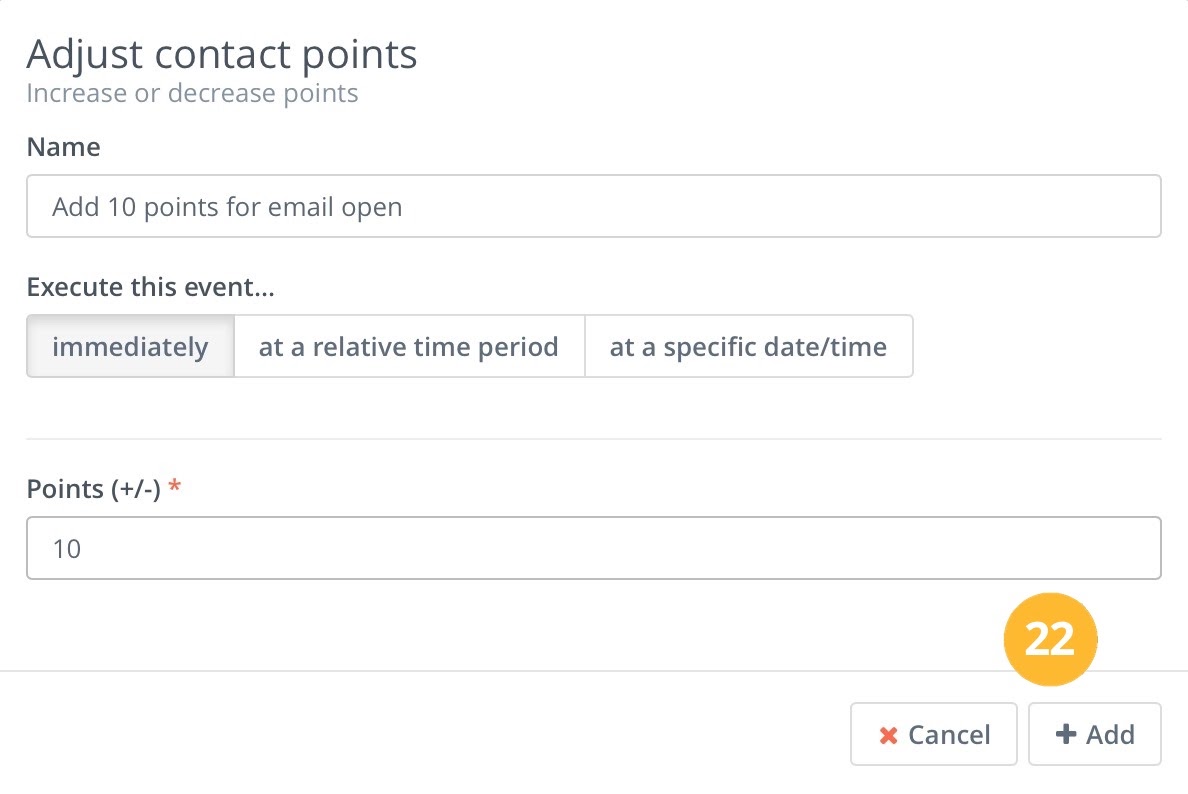
- Click on the left anchor, and select Action, then Adjust contact points.
- Enter Add 10 points for email open for the name field and enter “10” in the points field. Click Add.
- Click Close Builder.
- Click on Yes to publish the campaign.
- Click Save and Close. You’ll see the statistics for this campaign.
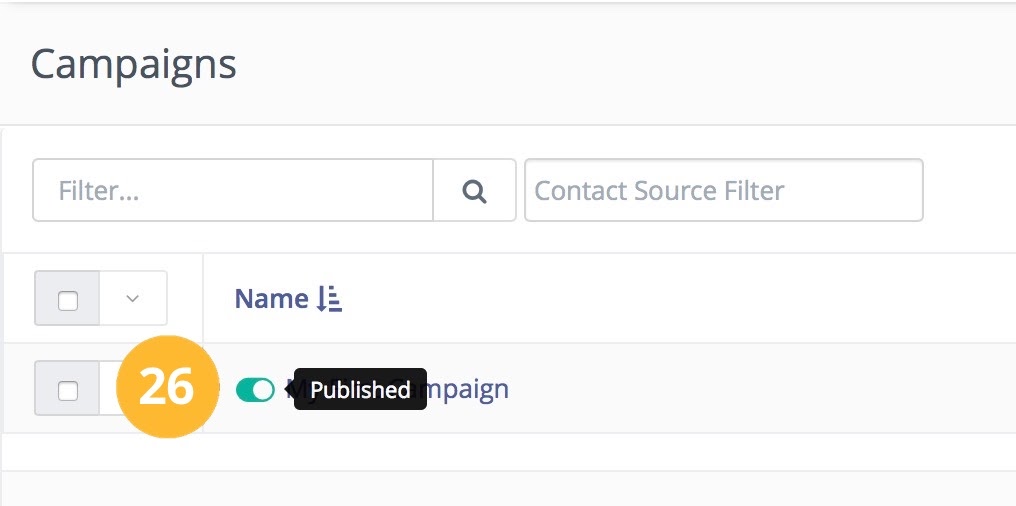
- Make sure the campaign is published. If not, click the slider to change it to published.
5. Form Test
The only thing left to do is test your new campaign!
- Click on Components and then Landing Pages.
- Click on My First Landing Page.
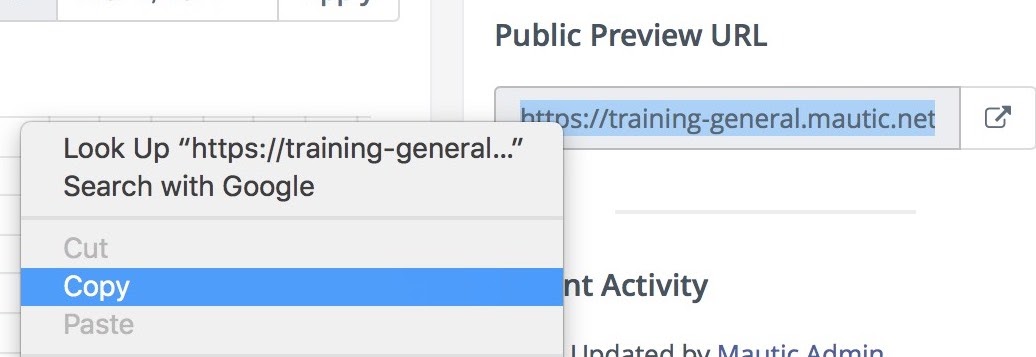
- Copy the URL for the Public Preview (right-click on the URL and click Copy).
- Either log out of Mautic or open an incognito browser.
- Paste the URL into the address bar of your browser. You should see your landing page. Go ahead and fill in the form using your real name and email address.
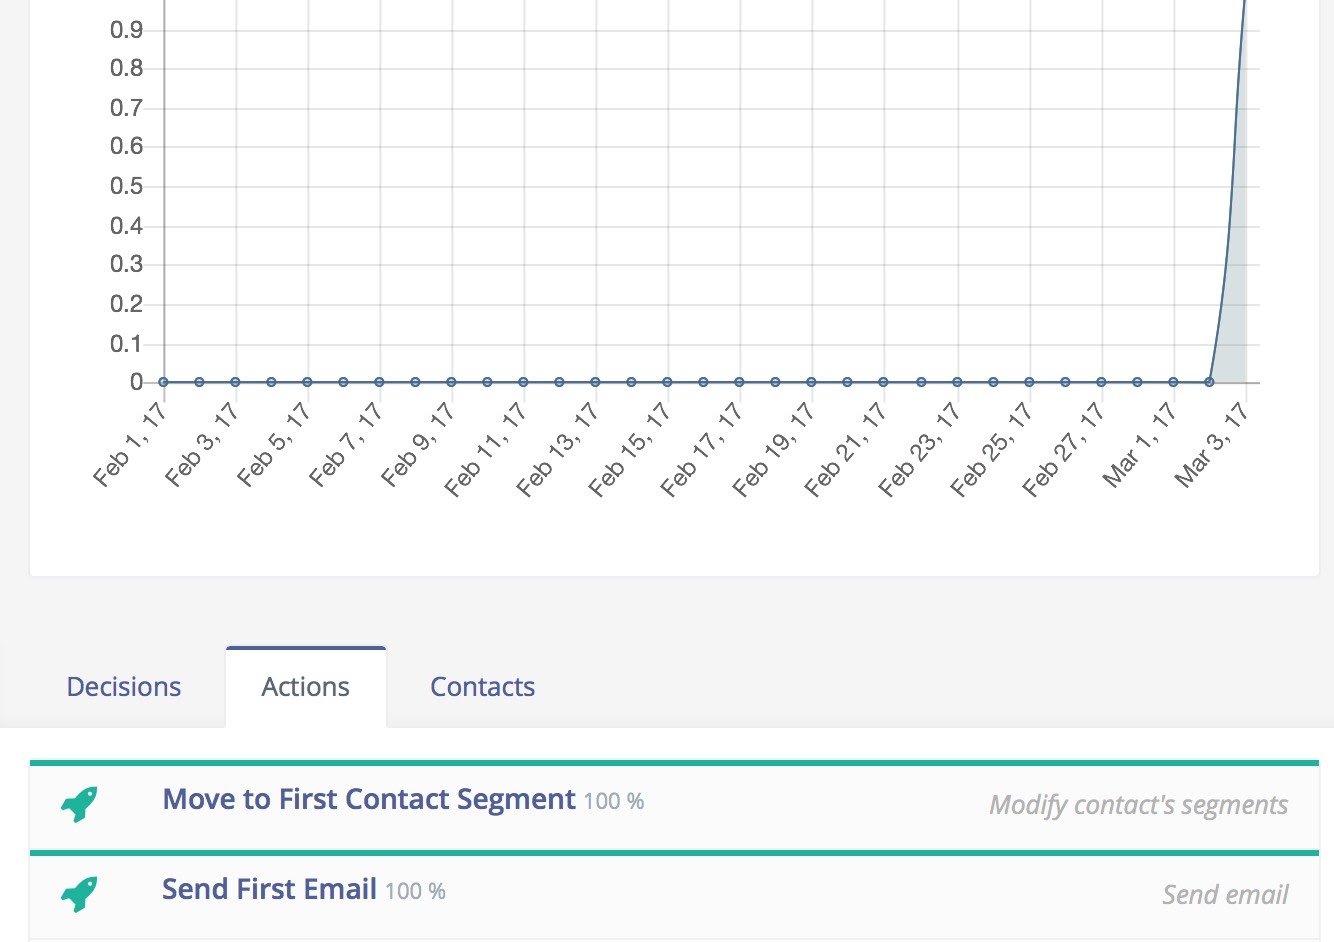
- Head back over to Mautic and click on Campaigns -> My First Campaign. You’ll see that one person has been processed in the campaign. Click on the Actions tab to see what actions have been performed so far.
- Click on Channels, then Emails. You’ll see that one email has been sent. Check your email. (it may take a few minutes to arrive).
6. Track the performance of Mautic campaigns
There are specific metrics you’ll want to review to understand both granularly and holistically regarding how your Campaign performed.
A few examples of the granular items you’ll want to review are:
- Click on the Form to see who responded.
- Click on the Email to see sends, bounces, and opens.
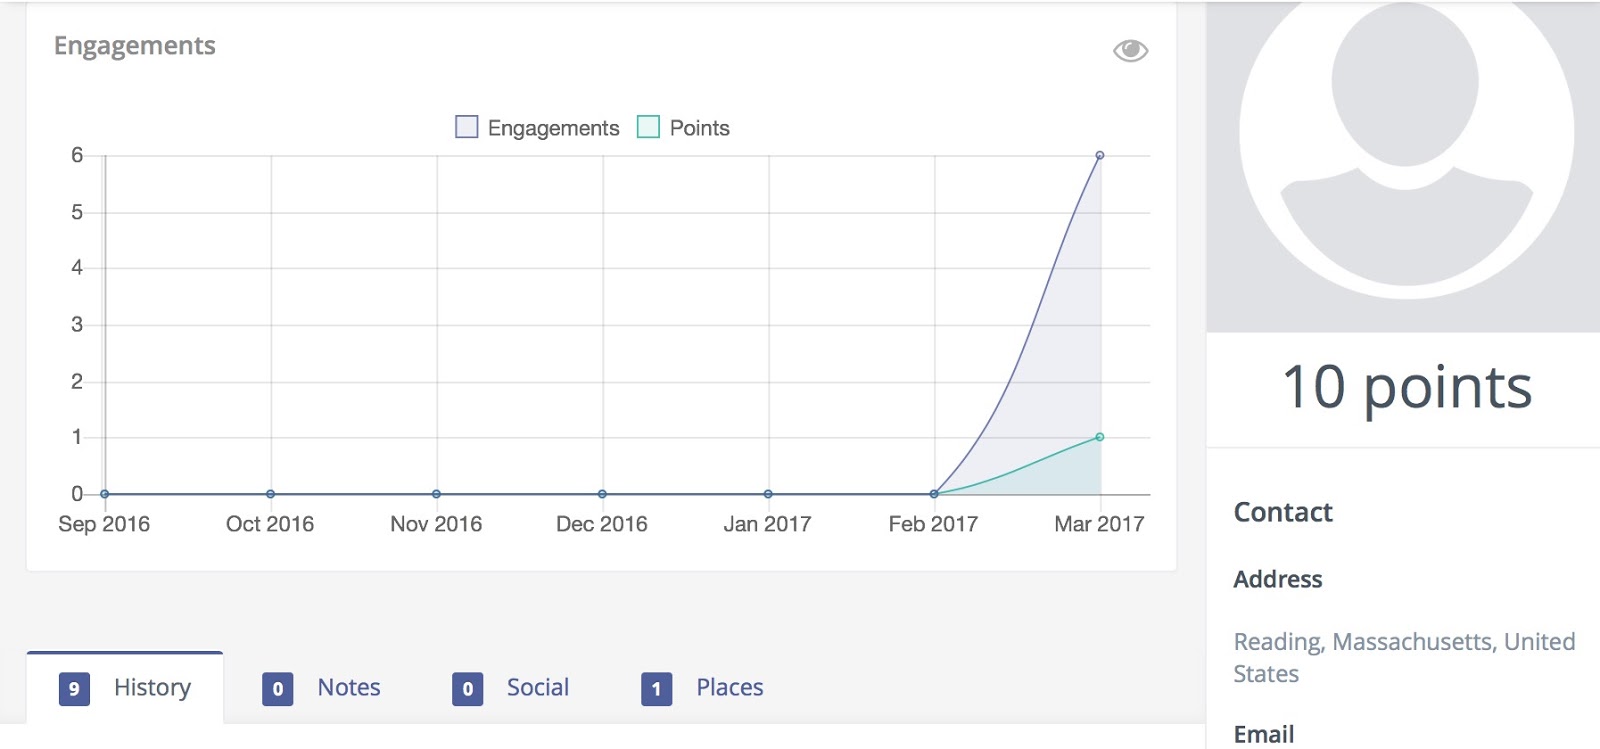
- Click on any Contact to see their entire history.
- Click on any Campaign to see every action that was triggered.
For an holistic view of Campaign performance, Mautic has several reports you can use to measure progress. To review your Reports, perform the following:
- Click on Reports.
- Click on Leads and Points to see an example.

Reporting is only as valuable as the actionable intelligence derived from it. A few examples of actionable intelligence:
- Using data to analyze overall marketing efforts to optimize spend, resource allocation, and inform future planning.
- Using data in real-time to make changes to individual campaign components and delivery channels to ensure the right content gets to the right people at the exact time they need it. Marketing intelligence will improve organizational efficiency and effectiveness allowing your team to go beyond campaign execution. It allows a marketer to focus on improving the end-user experience at each stage of the buyer’s journey.
7. Create a report
- In the Reports section, click New.
- Enter a name – Form Submissions in 2020.
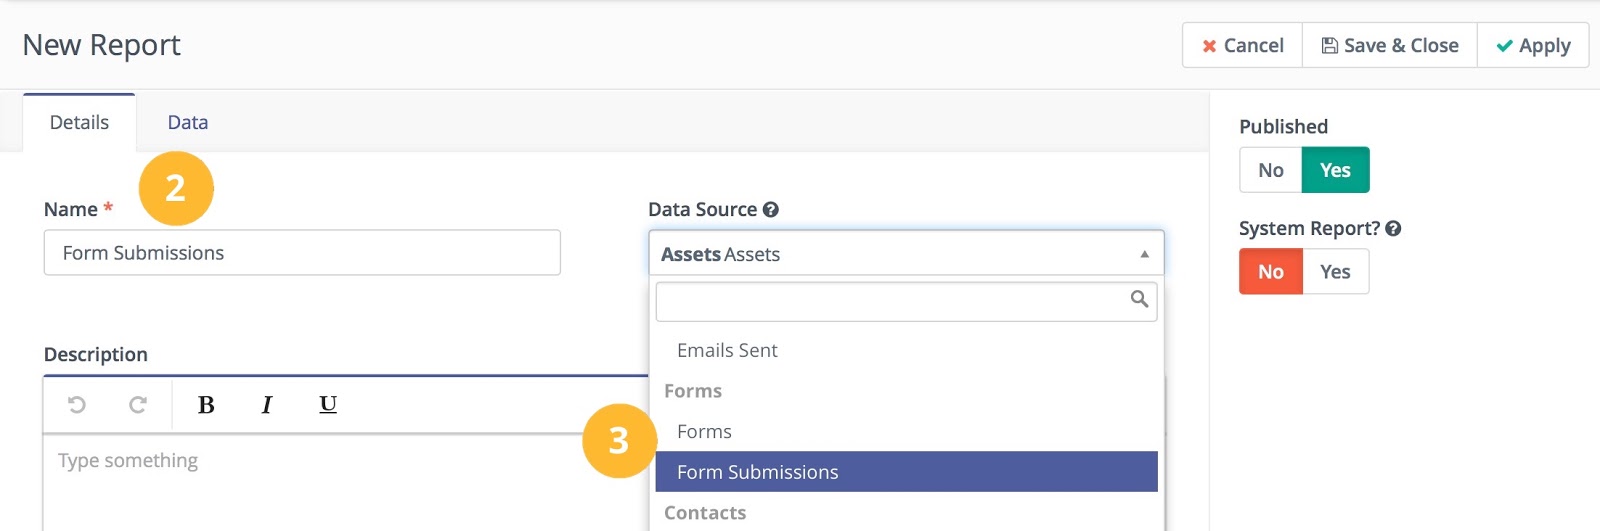
- Populate the data source from which you want to create the report. Choose Form Submissions from the data source drop-down.
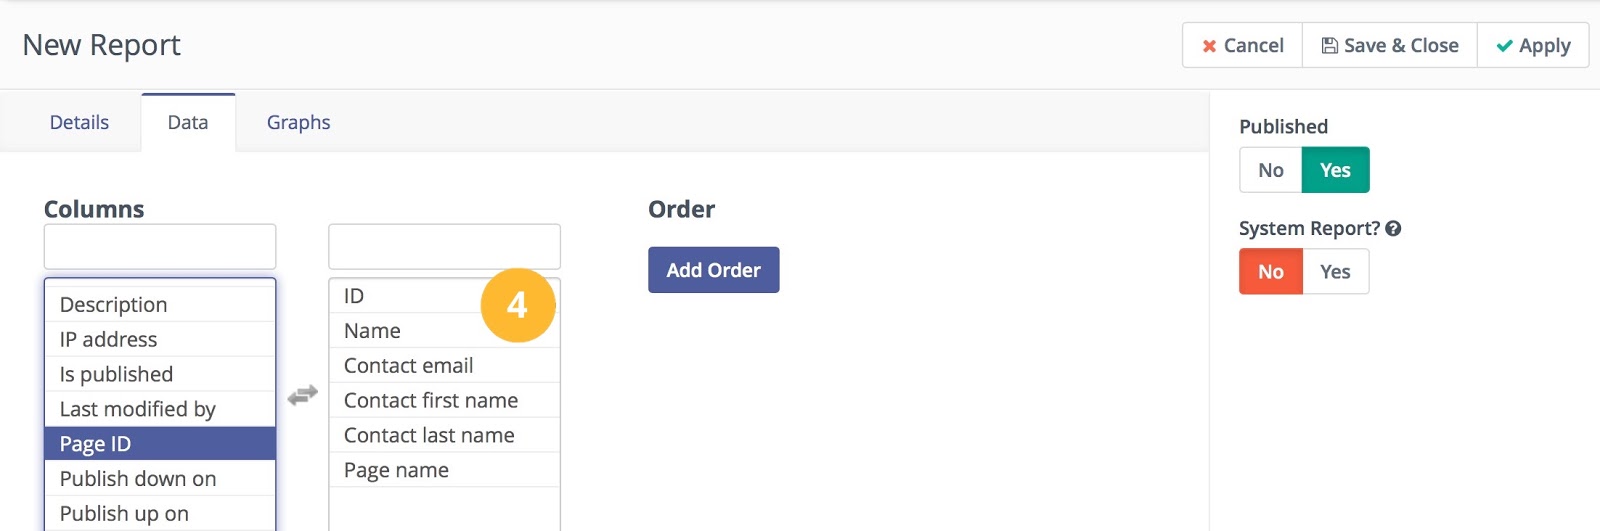
- Click on the Data tab to specify the columns and filters you want in your report.
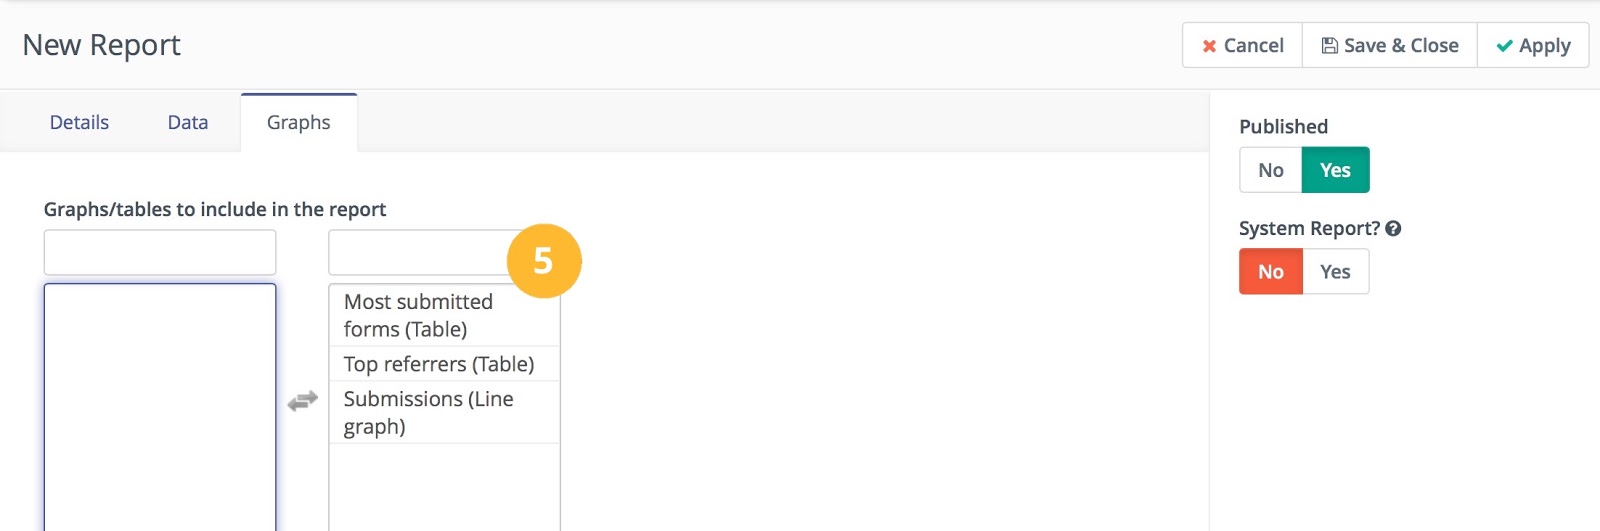
- Click Save and Close, analyze the data, and optimize as necessary.
8. Dashboard review & customization
In addition to reports, the dashboard is a great place to see how your campaigns are performing in real-time.
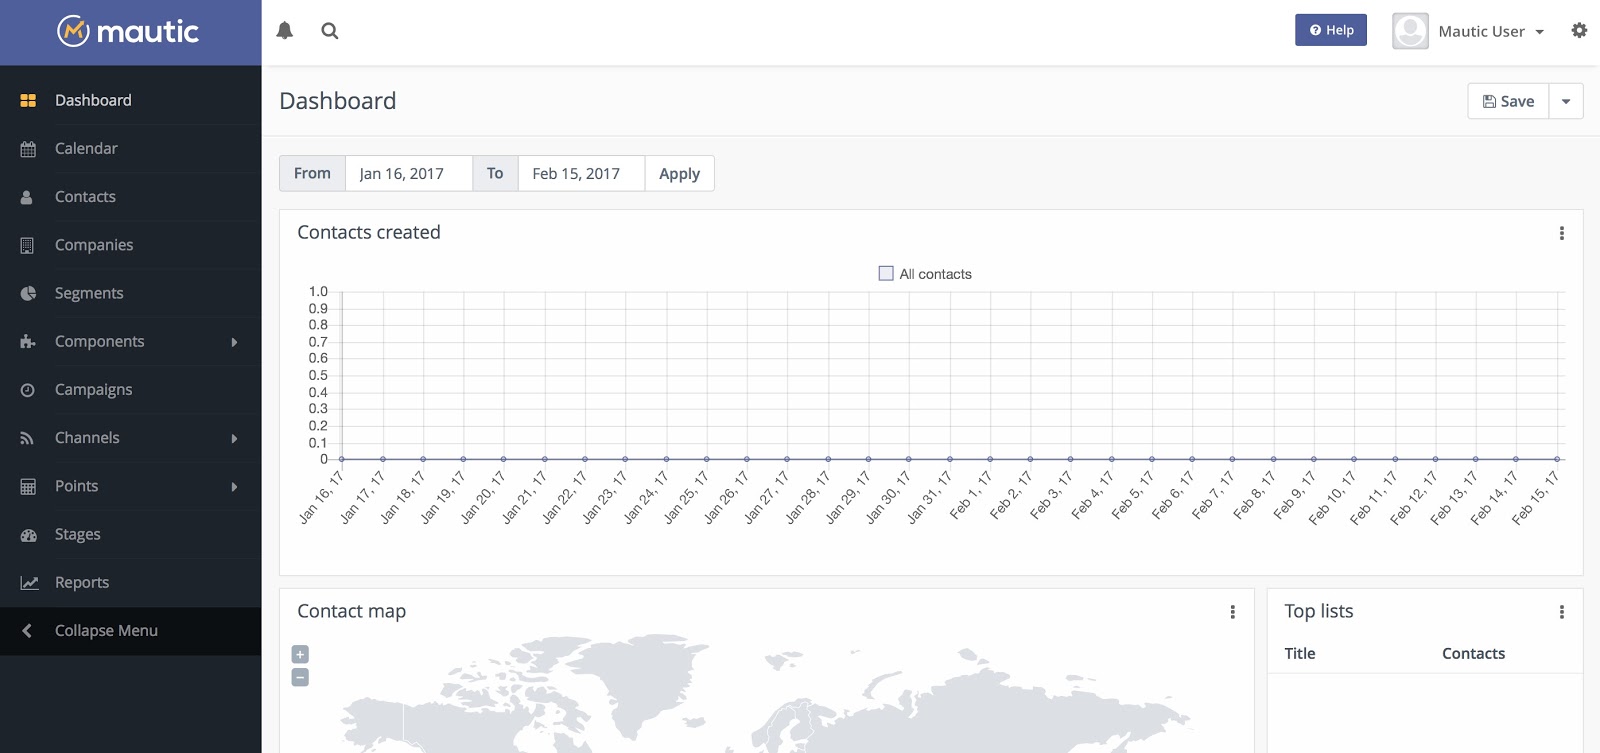
It’s your information center. The dashboard is flexible and fully customizable so you can view the metrics that are important to you in real-time.
Mautic allows each account user the flexibility to fully customize their dashboard view. There are several widgets out-of-the-box in Mautic which will allow users to see performance data that will be relevant to their role.
Dashboards can be exported and imported with ease, so you can create a template and easily apply it across different user accounts or Mautic instances.
Have any questions?
We are always happy to help. You can send your questions to our slack channel or the Mautic forum.
 French
This is outdated content. Landing page templates have been removed.
This is not the case any more, there are now several landing pages that ship with Mautic - it just took time for them to be contributed by the volunteers who maintain Mautic when we switched to the GrapesJS builder.