How to Use the SendGrid API in Mautic 5 with Symfony Mailer
Estimated Reading Time: 2 MinutesBy default, Mautic offers built-in support for several mail transports, including SMTP and SendGrid. However, if you prefer more direct control using Symfony’s Mailer component, you can install the symfony/sendgrid-mailer package and configure Mautic to use sendgrid+api as the transport. This guide shows you how.
Table of Contents
- Prerequisites
- Step 1: Install Symfony SendGrid Mailer
- Step 2: Generate a SendGrid API Key
- Step 3: Configure Mautic to Use sendgrid+api
- Step 4: Test Your SendGrid Integration
- Troubleshooting & Tips
- Summary
Prerequisites
- An existing Mautic 5 installation (with Composer enabled).
- A SendGrid account (free or paid).
- Command-line access to your Mautic server.
Step 1: Install Symfony SendGrid Mailer
SSH into your server, navigate to your Mautic folder (often/var/www/mautic), and run:
cd /var/www/mautic
sudo -u www-data composer require symfony/sendgrid-mailer:*
This ensures all new packages are installed with the correct file ownership (www-data). You’ll now havesymfony/sendgrid-mailerin your Mautic project.
Step 2: Generate a SendGrid API Key
- Log into SendGrid at https://app.sendgrid.com/.
- Go to Settings → API Keys, then click Create API Key.
-
Name it something like Mautic and give it Full Access to Mail Send.
- Click Create & View to see the API Key. Copy and save it in a secure place.
Tip: You must set up domain authentication (SPF, DKIM and DMARC) in SendGrid’s “Sender Authentication” section.
Tip: Disable SendGrid's built in Click and Open tracking. It can break links generated by Mautic's click tracking.
These can be found in Settings > Tracking in your SendGrid dashboard.
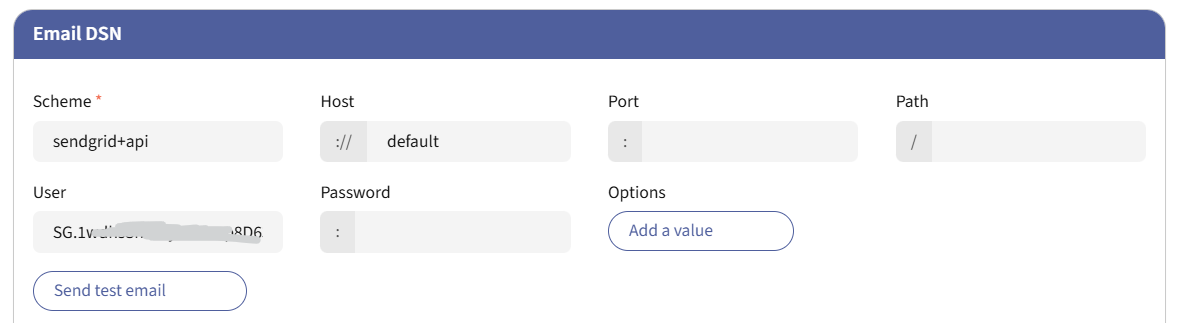
Step 3: Configure Mautic to Use sendgrid+api
In Configuration > Email Settings > Email DSN, set Scheme to “sendgrid+api”, Host to “default”, Port, Path and Password should be empty, and the User field should contain your API key set up in step 2.
Step 4: Test Your SendGrid Integration
- Clear your Mautic Cache: If you’ve edited config files manually, run:
php bin/console cache:clear
- Create a Test Email: In Mautic, go to Channels → Emails. Create a new email, fill in the details, and click Send Test Email to verify delivery.
- If it arrives in your inbox, your SendGrid configuration works!
This approach gives you maximum flexibility, leveraging Symfony Mailer’s sendgrid+api transport instead of traditional SMTP or Mautic’s built-in integration. Now, you can enjoy the reliability and analytics of SendGrid’s API alongside Mautic 5’s robust marketing automation platform.
How is bounce handling with SendGrid implemented?
Why is the API Key left exposed inside the configuration and not hashed ? Surely this is a big security risk?